The purpose of this tutorial is to show a way of setting up baked lightmap, realistic HDRI-based lighting for an exterior diorama scene and then taking steps to stylize the lighting. I will be using Unity with the Unified Rendering Pipeline for this example.
The environment art assets are from a free set of assets by Chicago Game Monster on the Unity Asset Store. I have done some modest changes to the shaders and geometry to make them URP compatible and take the light a bit better.

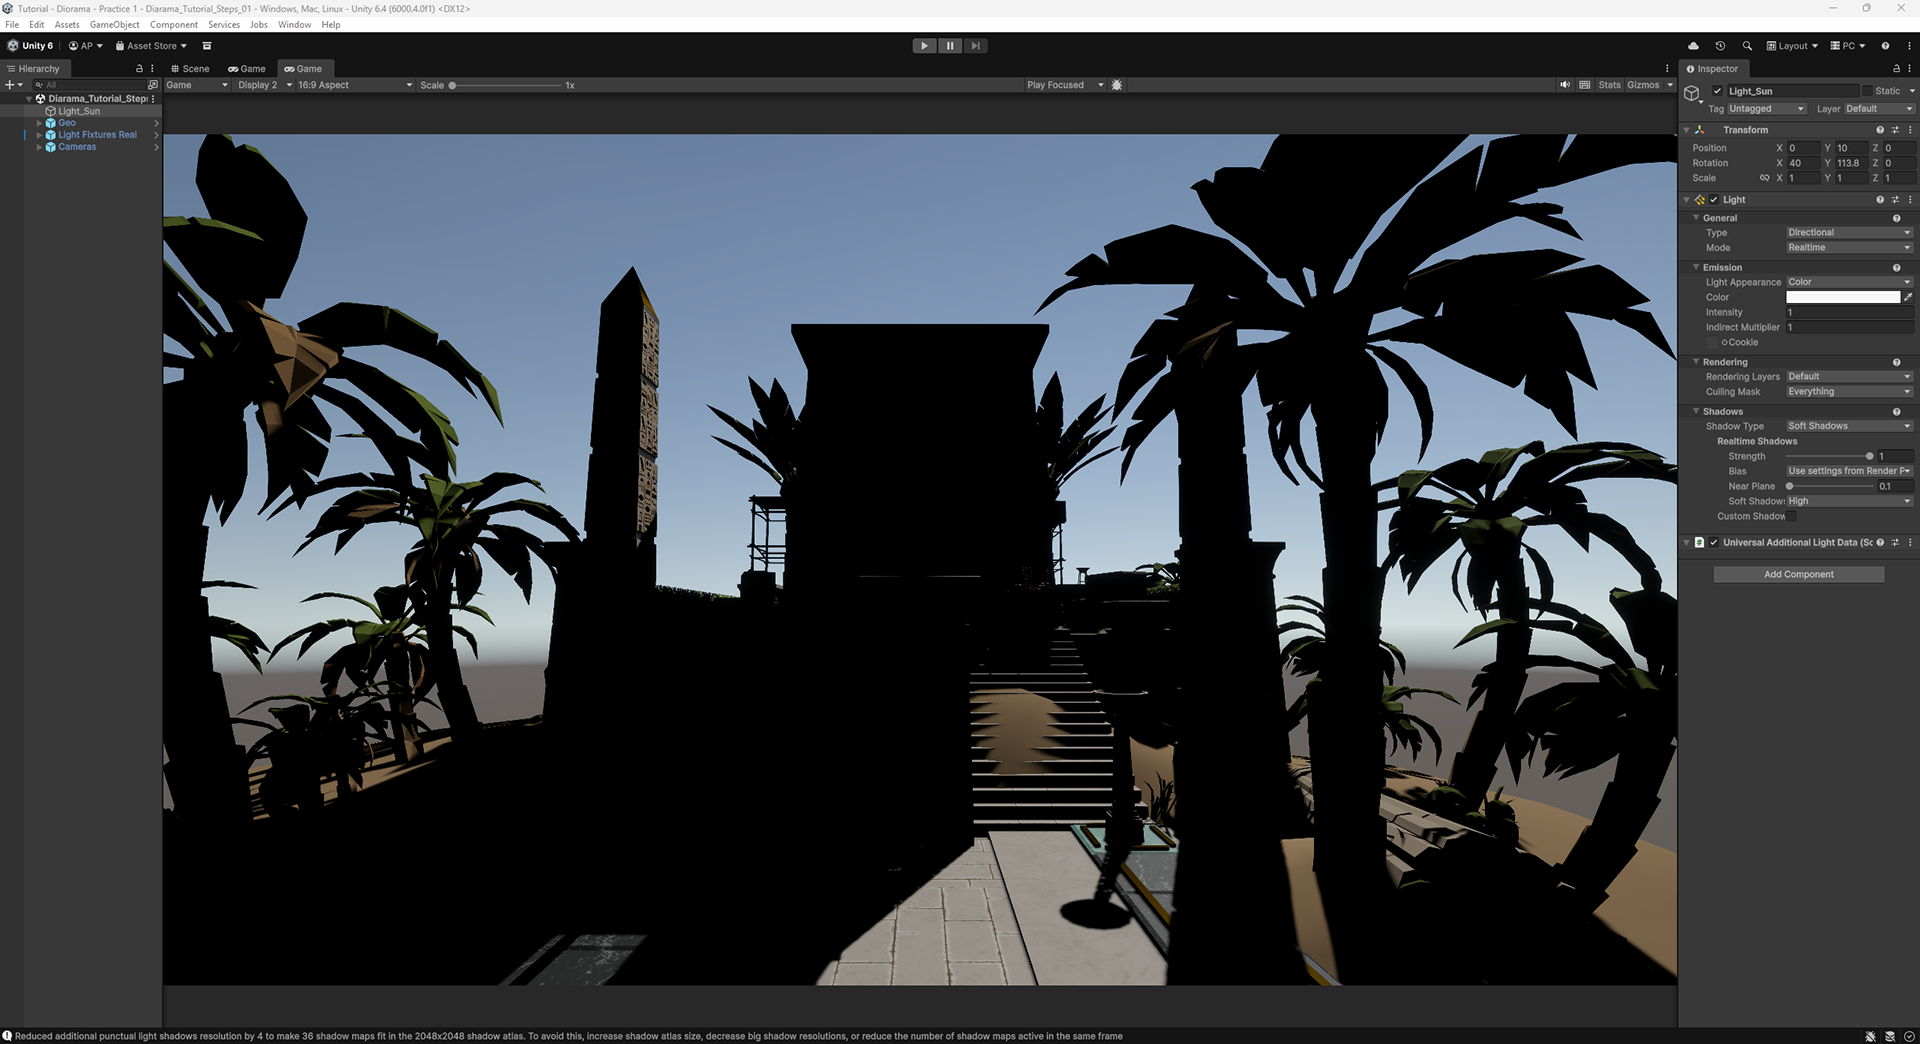
This journey will take us from simple editor lighting

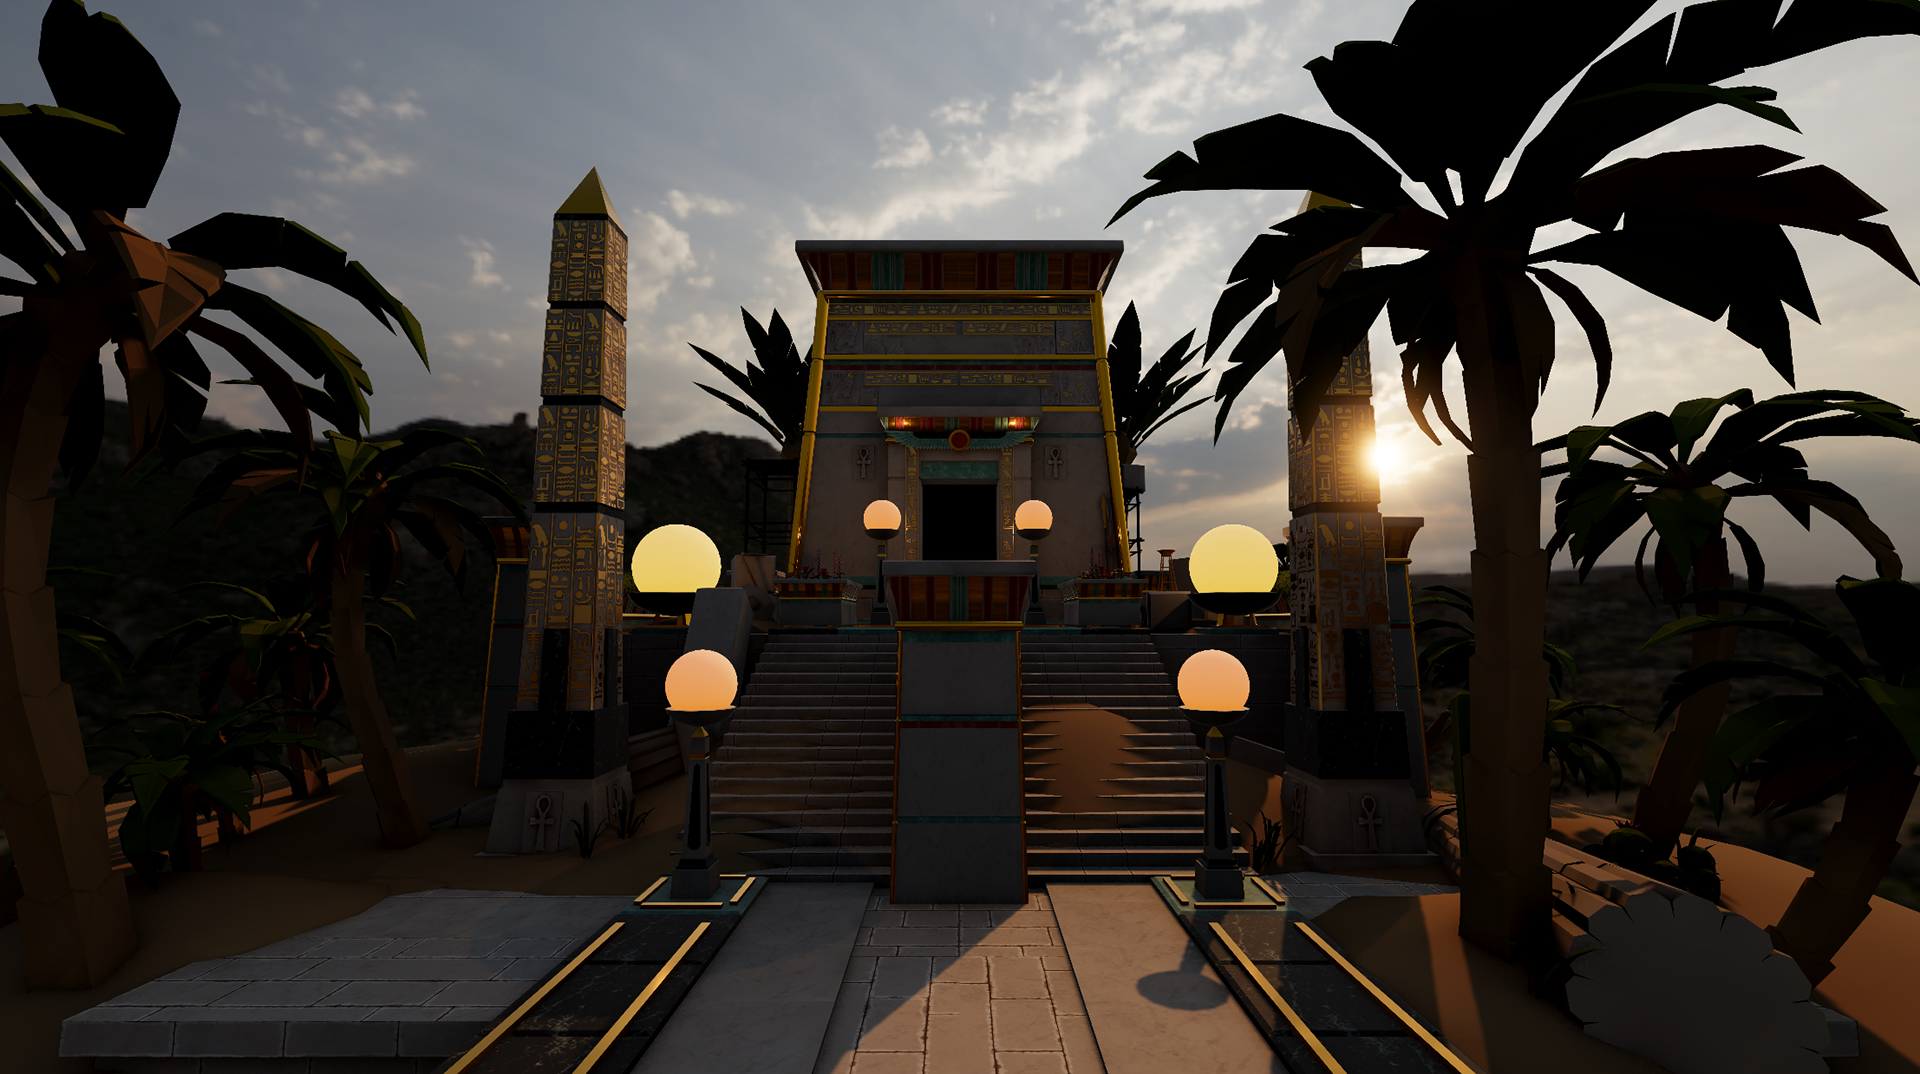
To realistic HDRI lighting
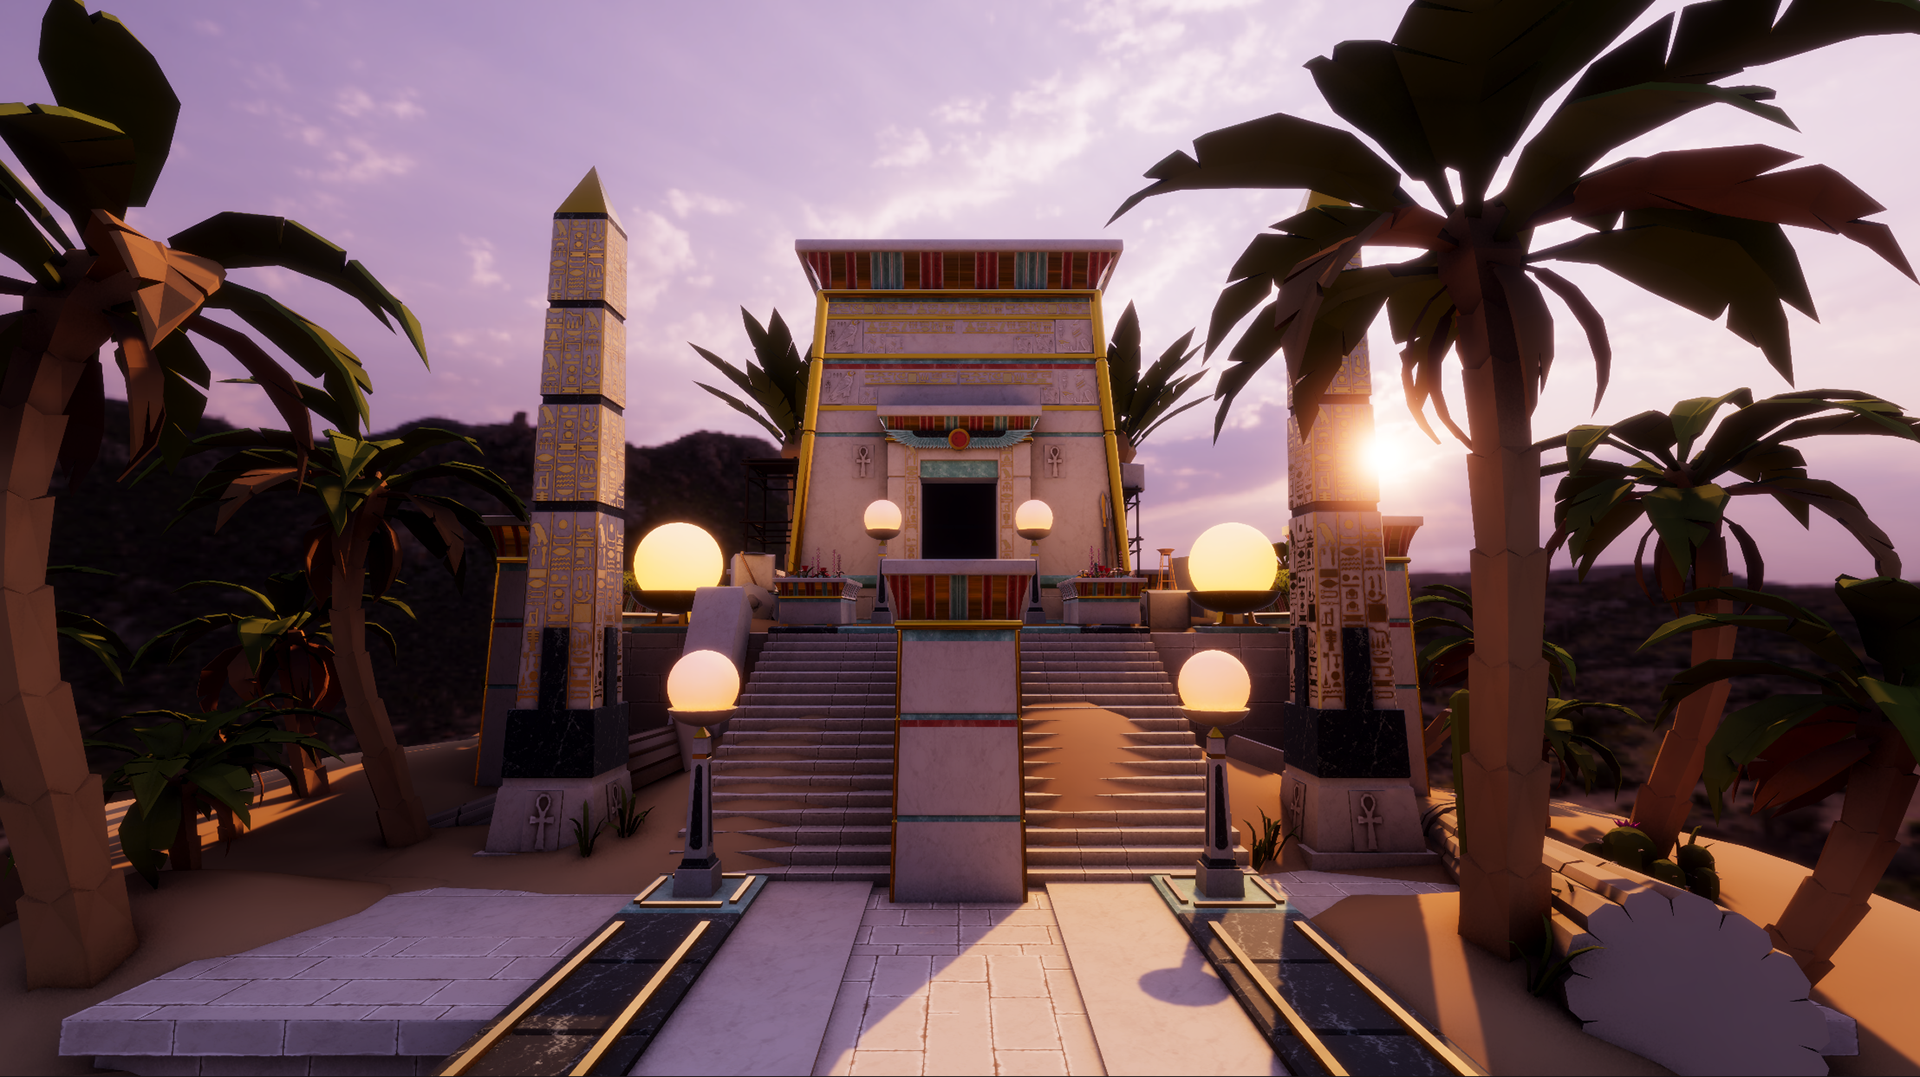
To stylized lighting
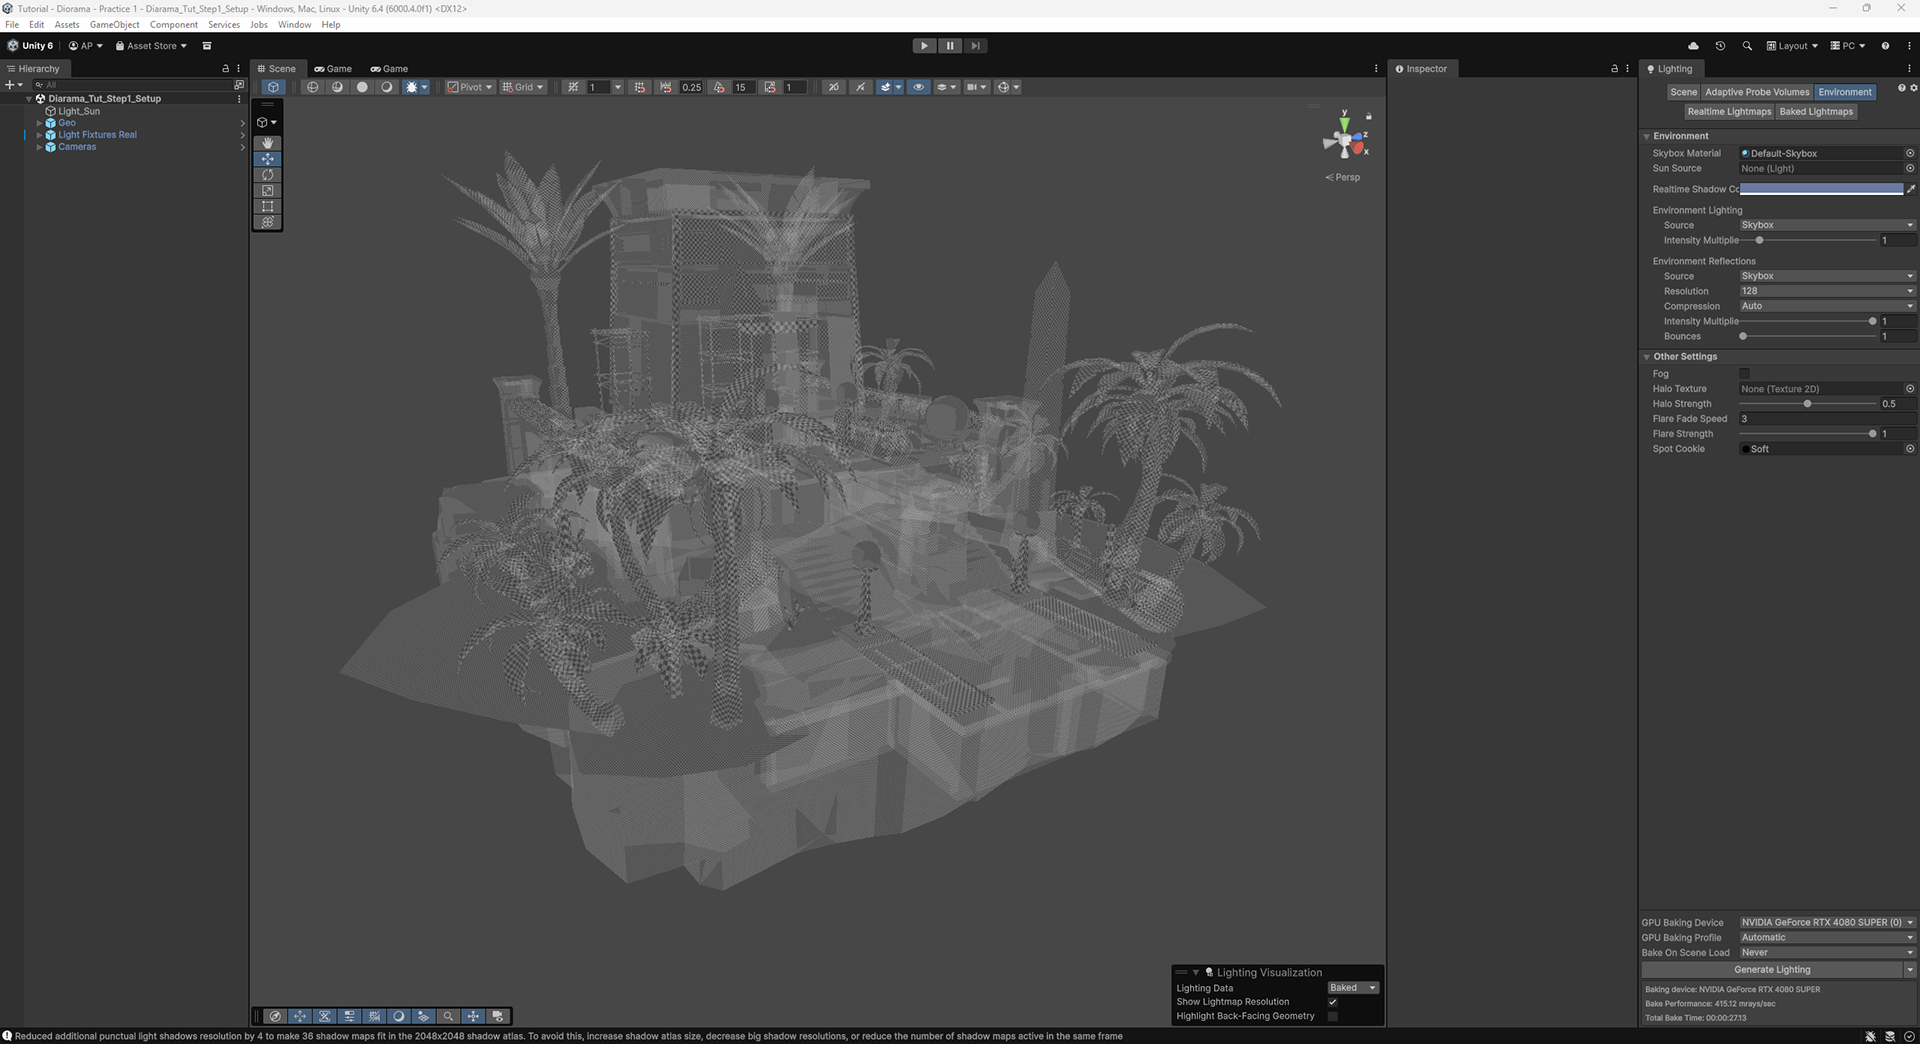
1. Scene Set Up
Make sure your geometry is properly set up to receive baked lighting.
1. Create lightmap UVs or have Unity create the lightmap UVs when you import your models.
2. Set all your meshes to be static objects.
3. Mesh lighting settings:
a. Cast Shadows: TWO SIDED
b. Static Shadow Caster TRUE
c. Contribute Global Illumination TRUE
d. Receive Global Illumination LIGHTMAPS
2. Lighting Look
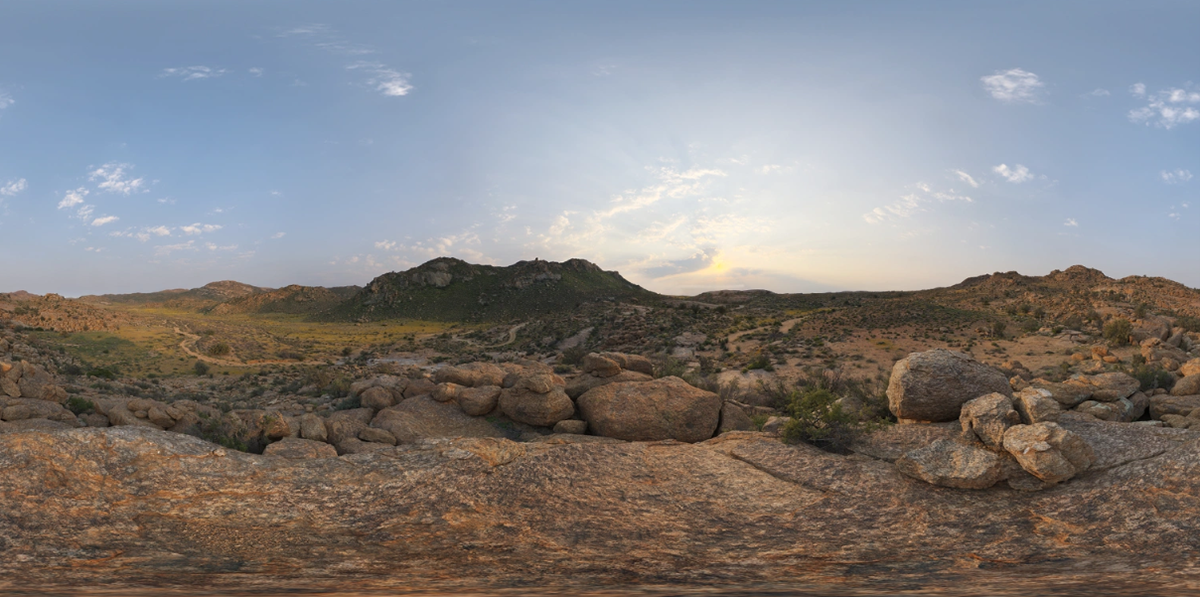
Pick a sun angle and HDRI panorama to be the base of your lighting.
The lighting look I wanted for this image was a warm-toned desert sunrise, with the sun glinting off the gold materials. I wanted some clouds in the scene to allow the sun and skylight to soften/open the shadows. I picked an image that was near to sunrise and dawn to give me some leeway to push pinks and purples into the scene.
I use PolyHaven as my source for high quality HDRI skies. For this scene I chose Klippad Sunrise 2 by Greg Zaal.
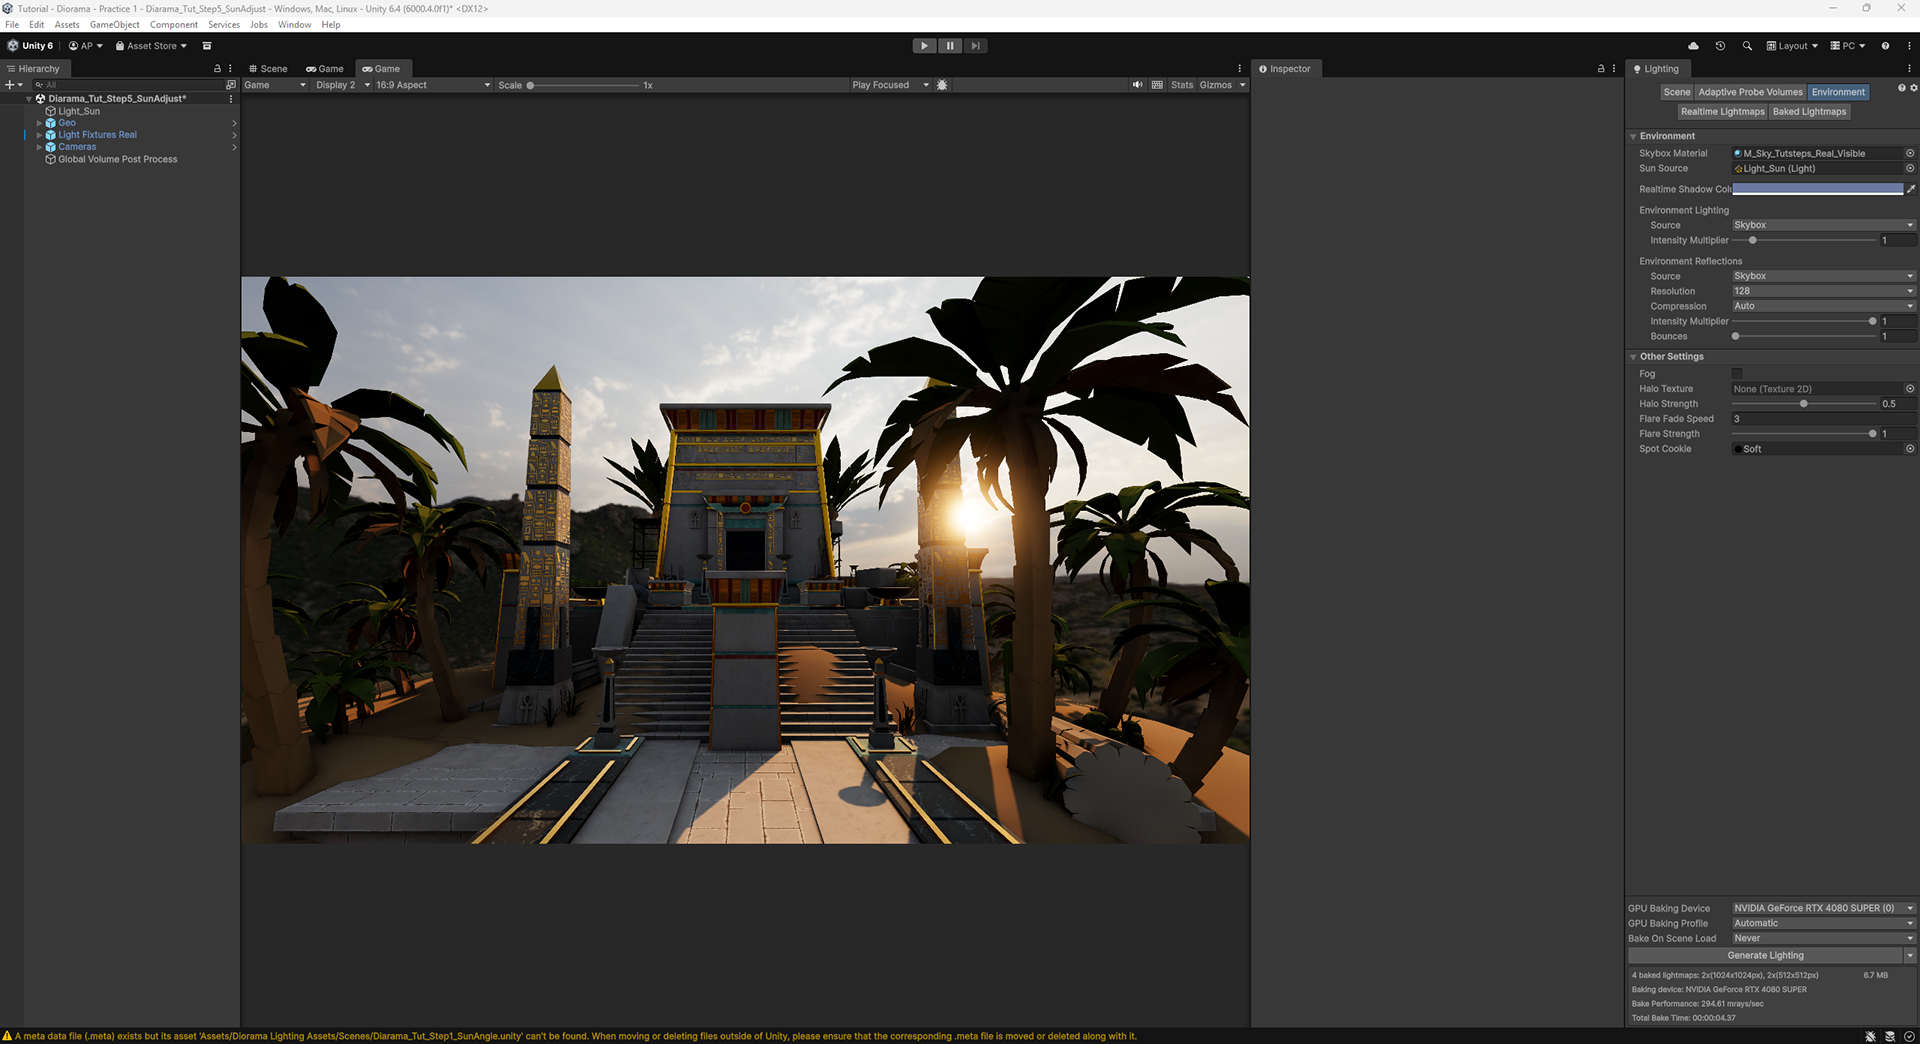
3. Sun Angle
I chose a light angle that would put the sun in the frame. I felt the warmth of the sunrise could be better felt if the sun was in the frame, and that more shadows in the scene would allow me to play up the color in the shadows. I also wanted the shadows to be cast over the torches, so it would be easier to see the light they cast in the environment.
4. Sky Visible Shaders
Create the sky shaders needed to render and align the sky.
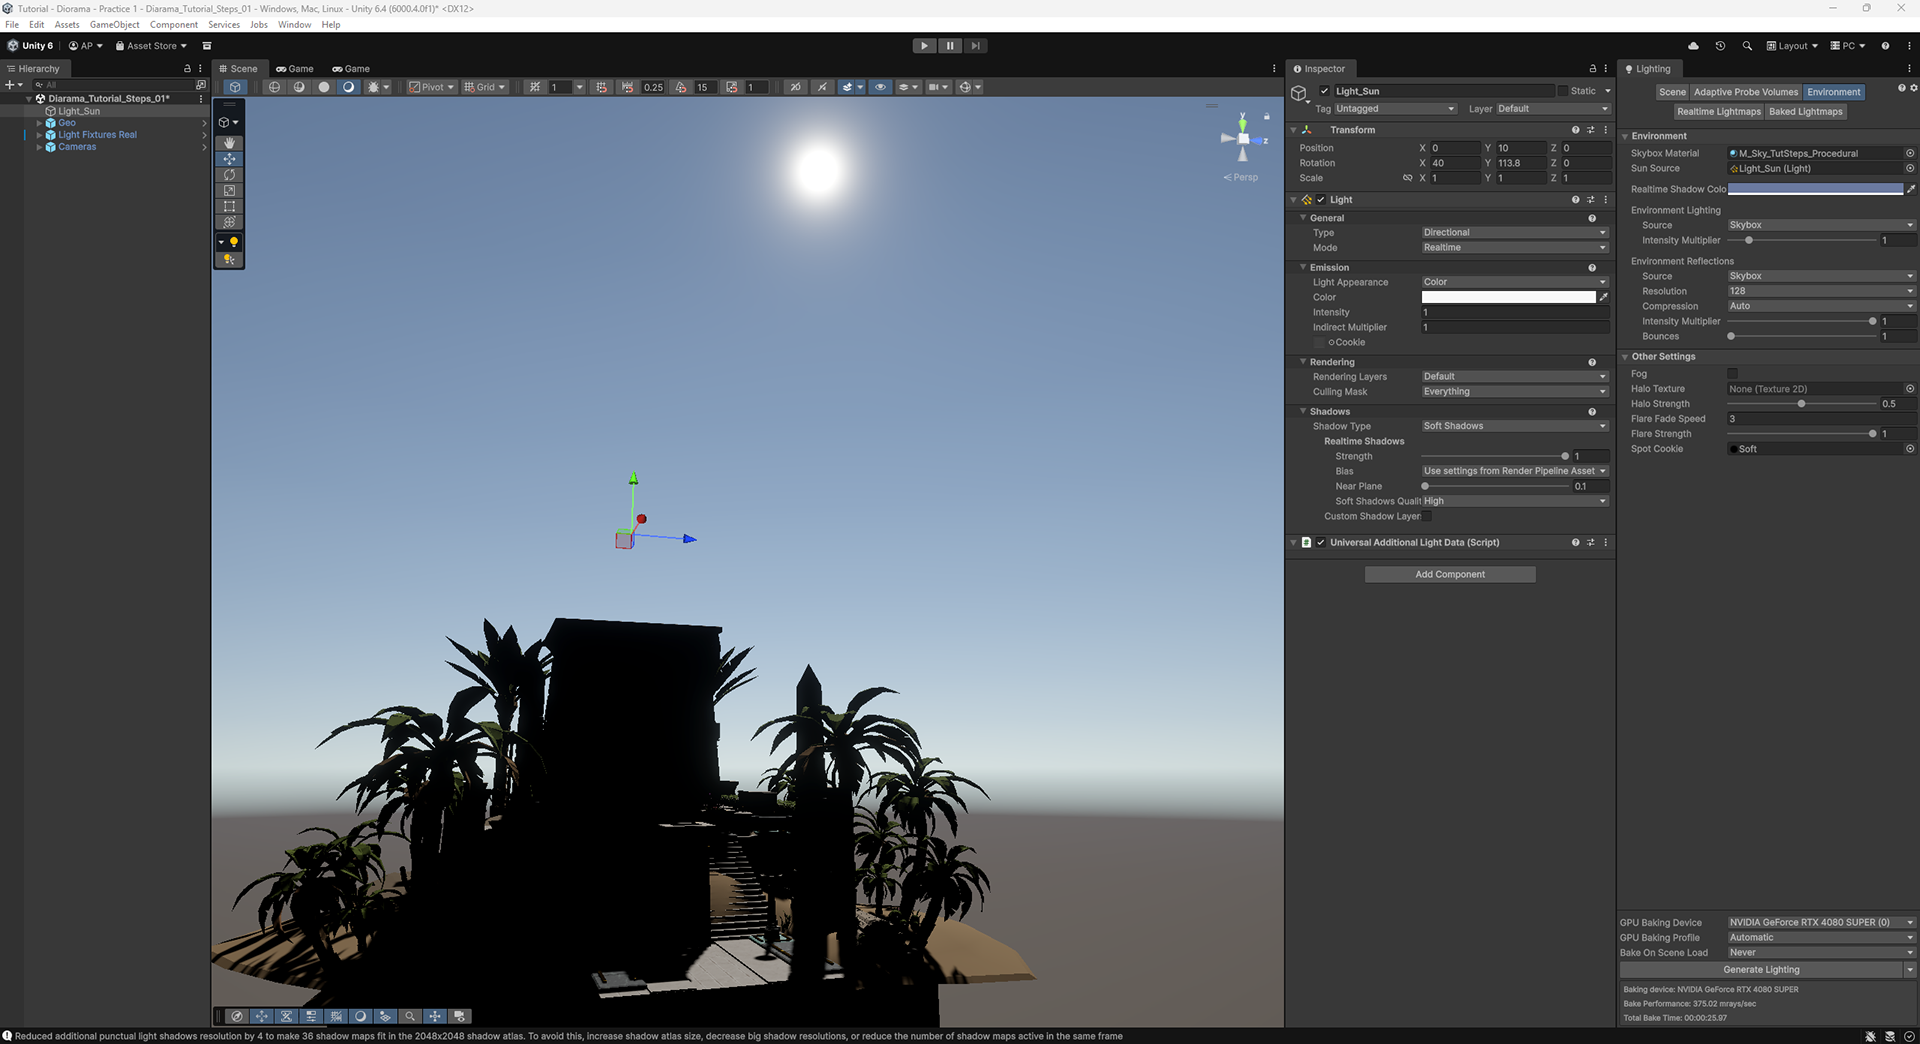
At this point two sky shaders are needed, a procedural sky to observe the position of the sun in the sky and, the HDRI panoramic sky for the background.
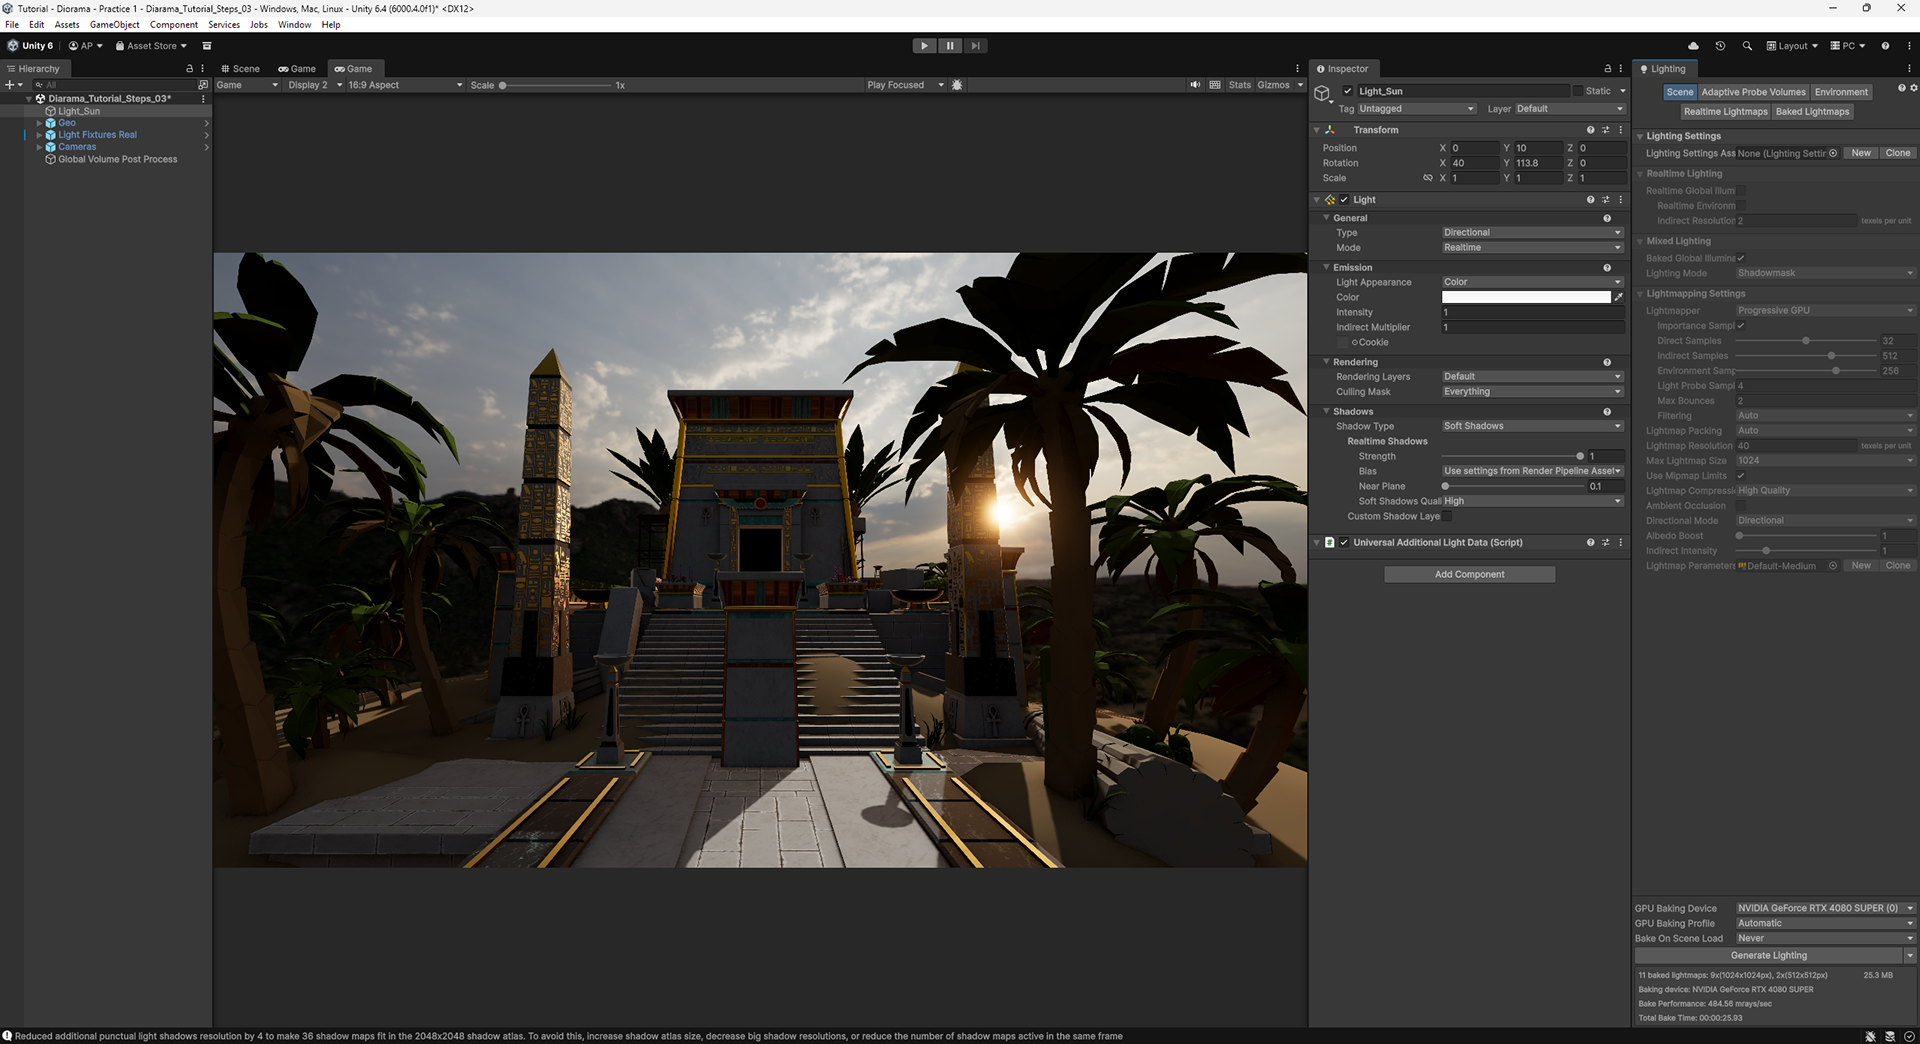
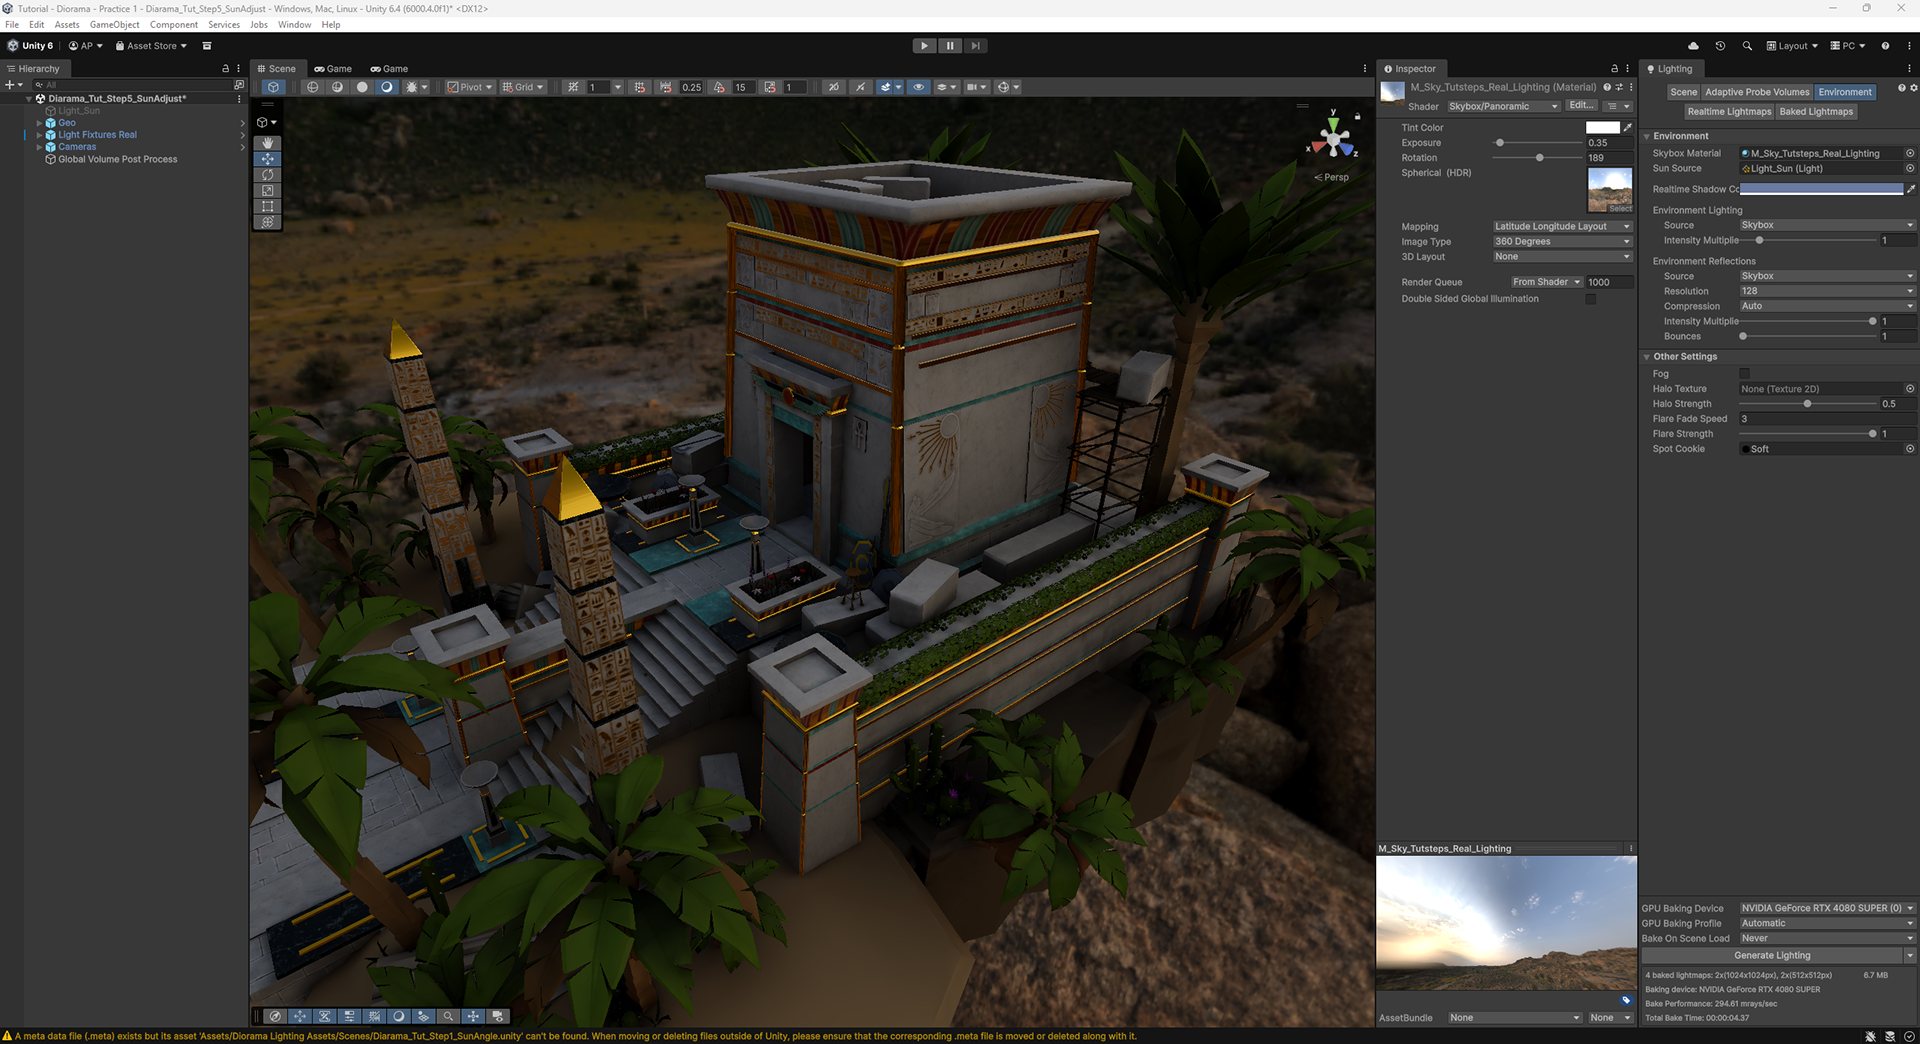
Create a skybox shader that uses a procedural sky, and assign the directional light to this shader. With the procedural shader applied, you can see your sun's azimuth and how far you've cheated the zenith. In this image, the sun is at a very high angle to be considered morning, but without the sun this high, our whole scene would be in shadow.
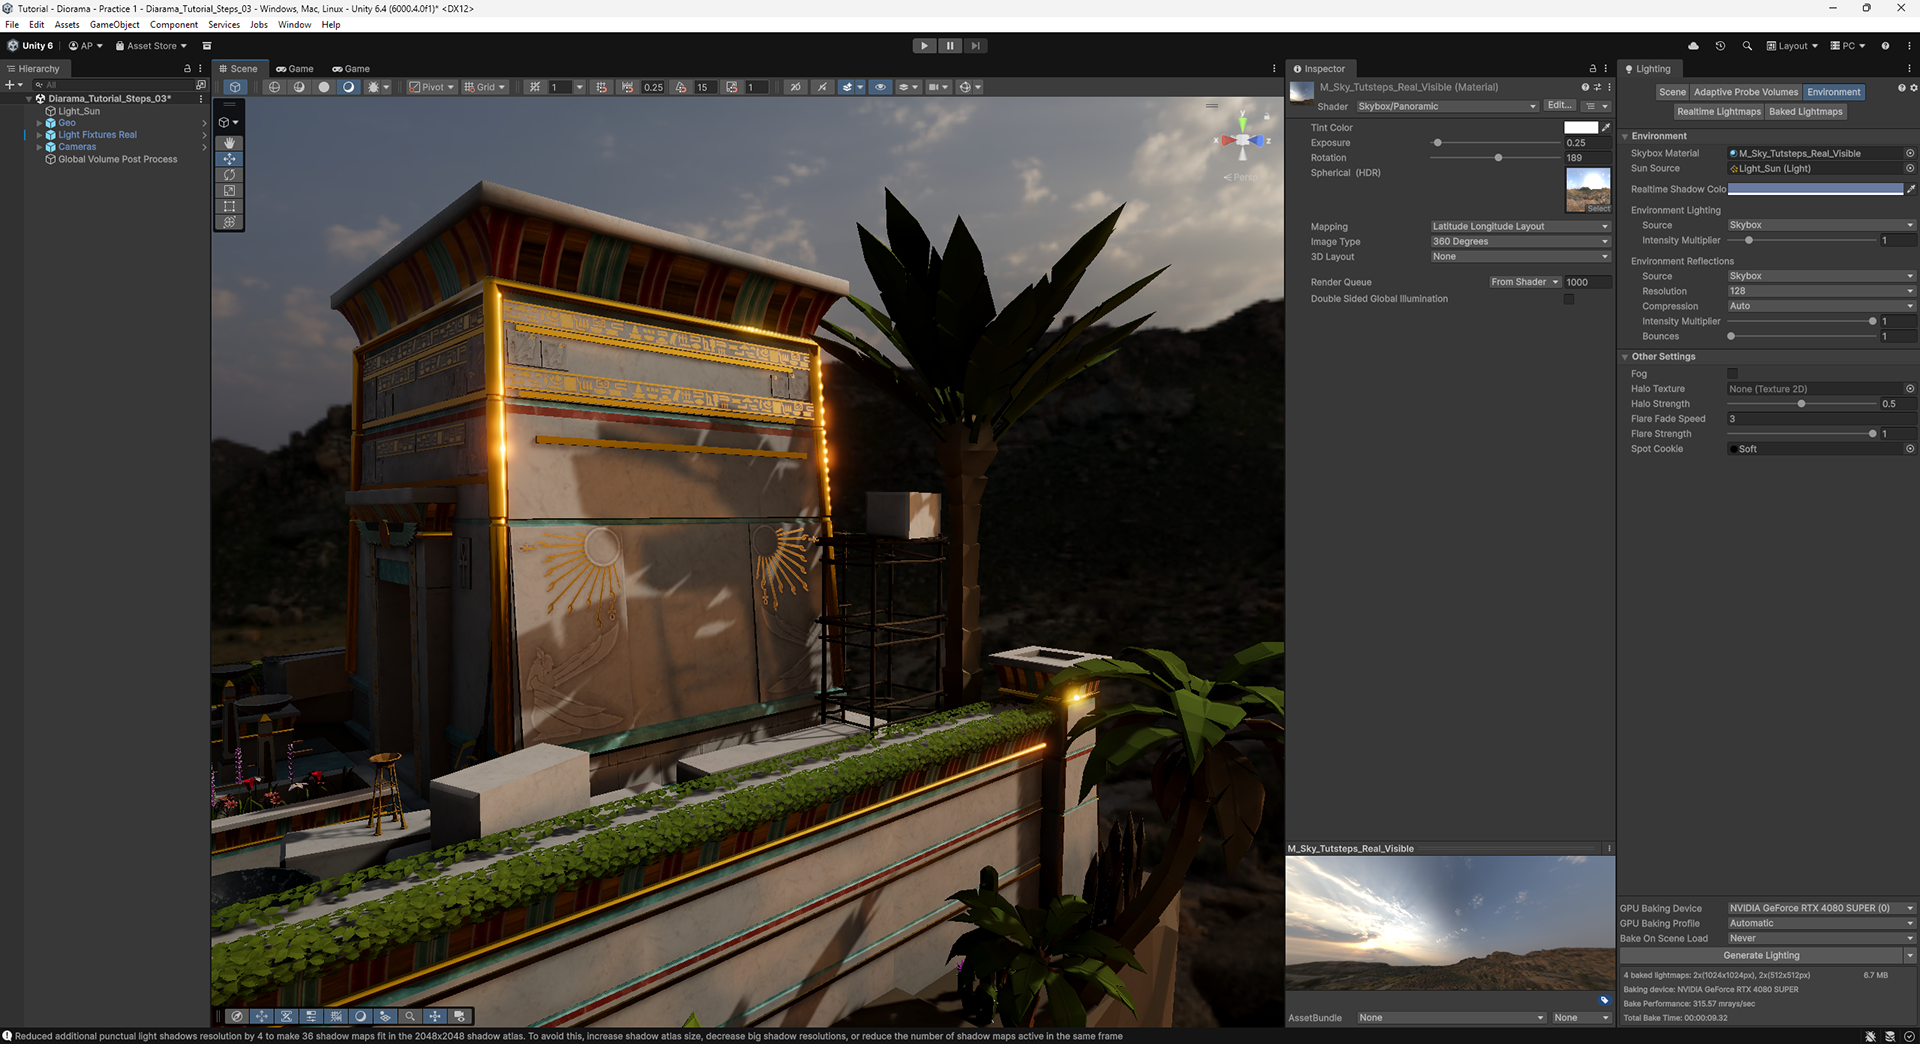
Now create and assign the Visible Sky shader with the panoramic HDRI assigned to it, and adjust the skybox shader rotation so it matches the azimuth of the sunlight from your directional light. You will probably have to dim your skybox exposure in order to clearly see the sun location.
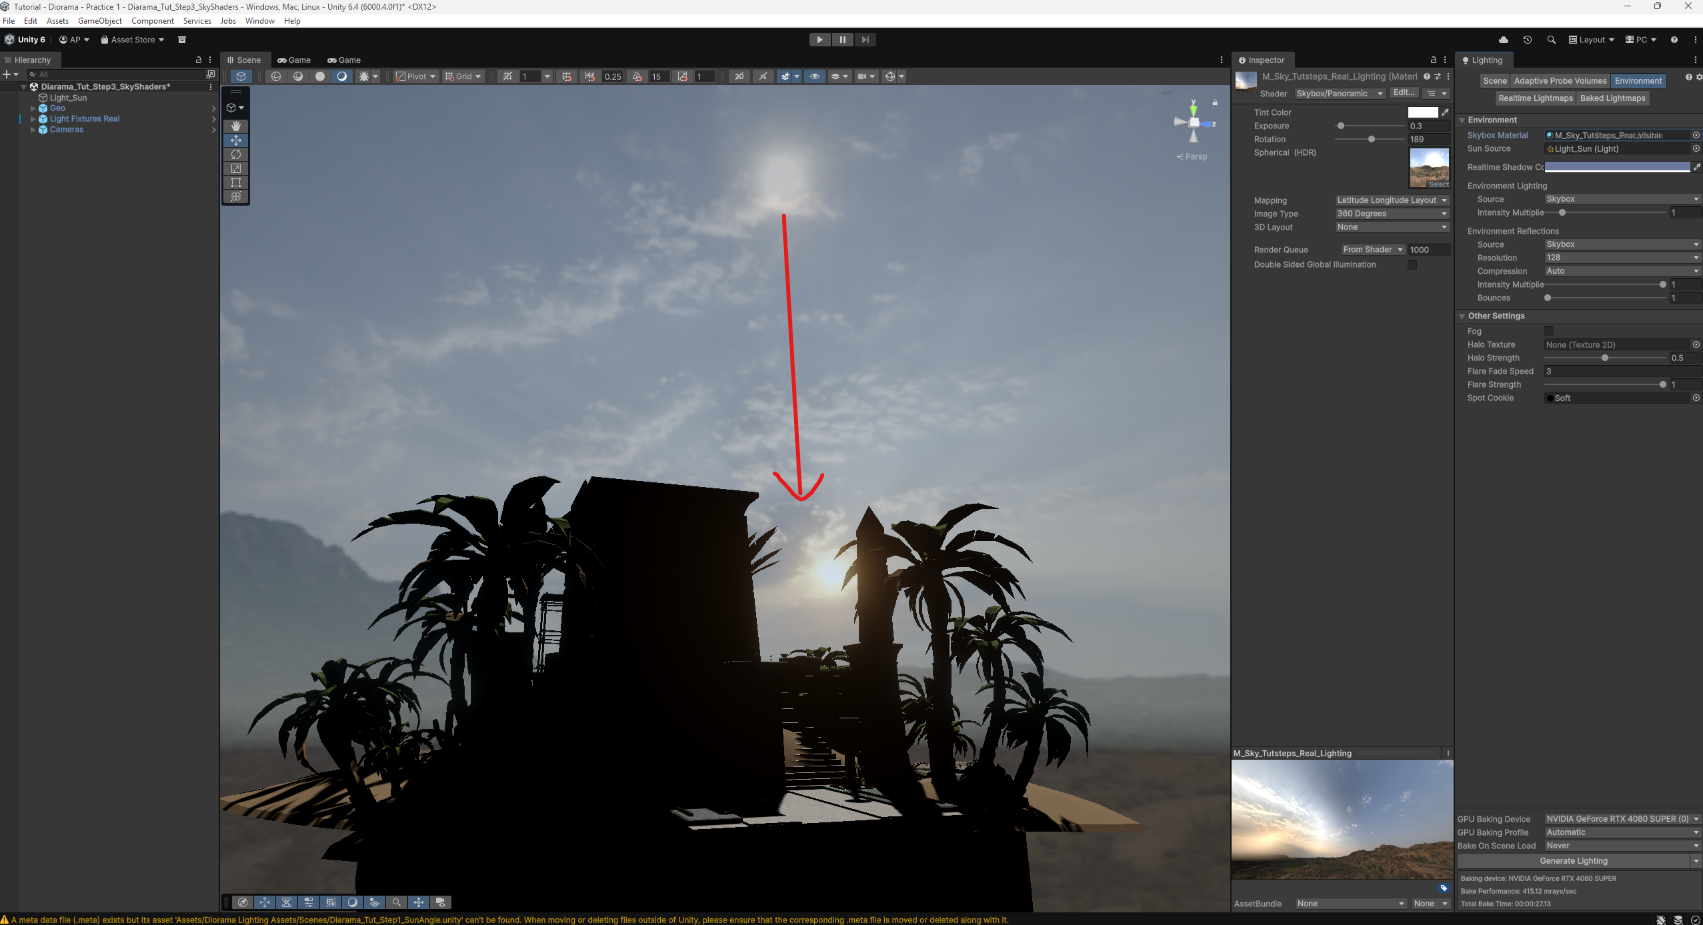
Align HDRI sky sun with azimuth of procedural sun.
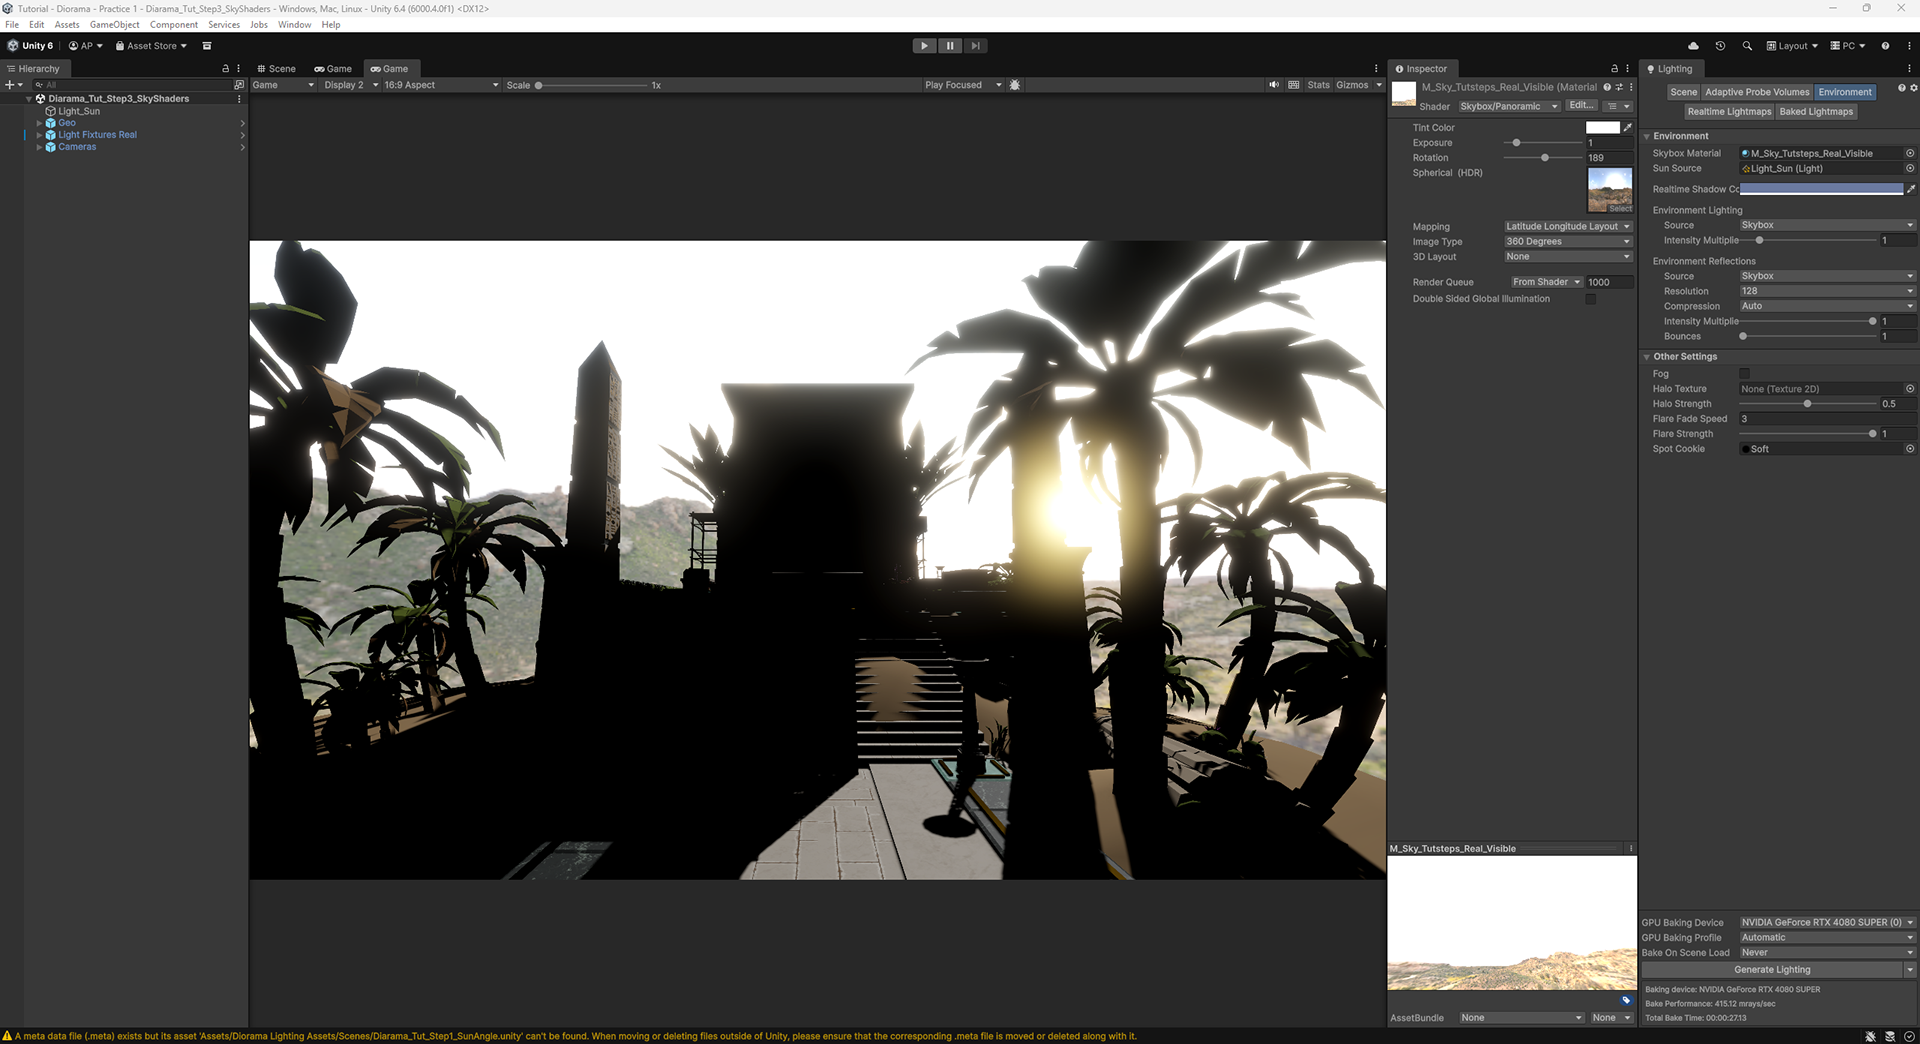
The HDRI at 1.0 exposure
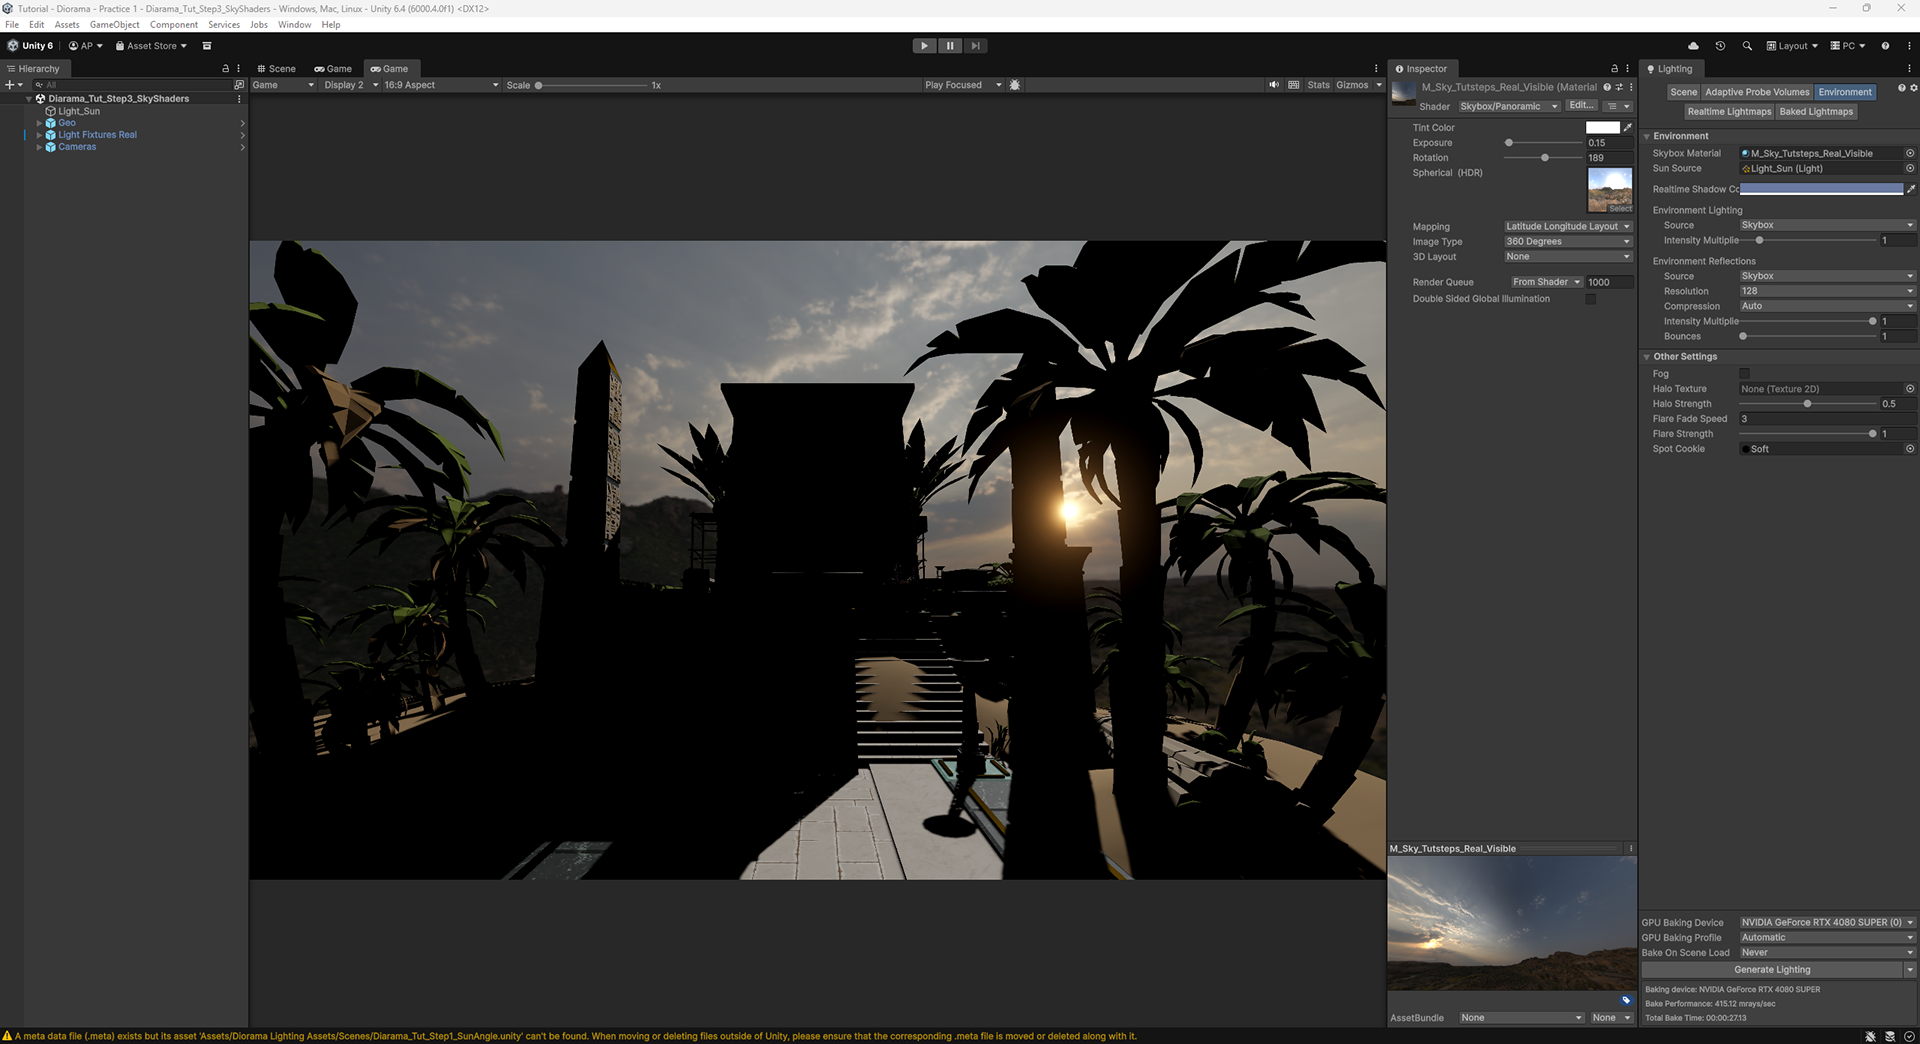
Dim down if necessary to see sun position better

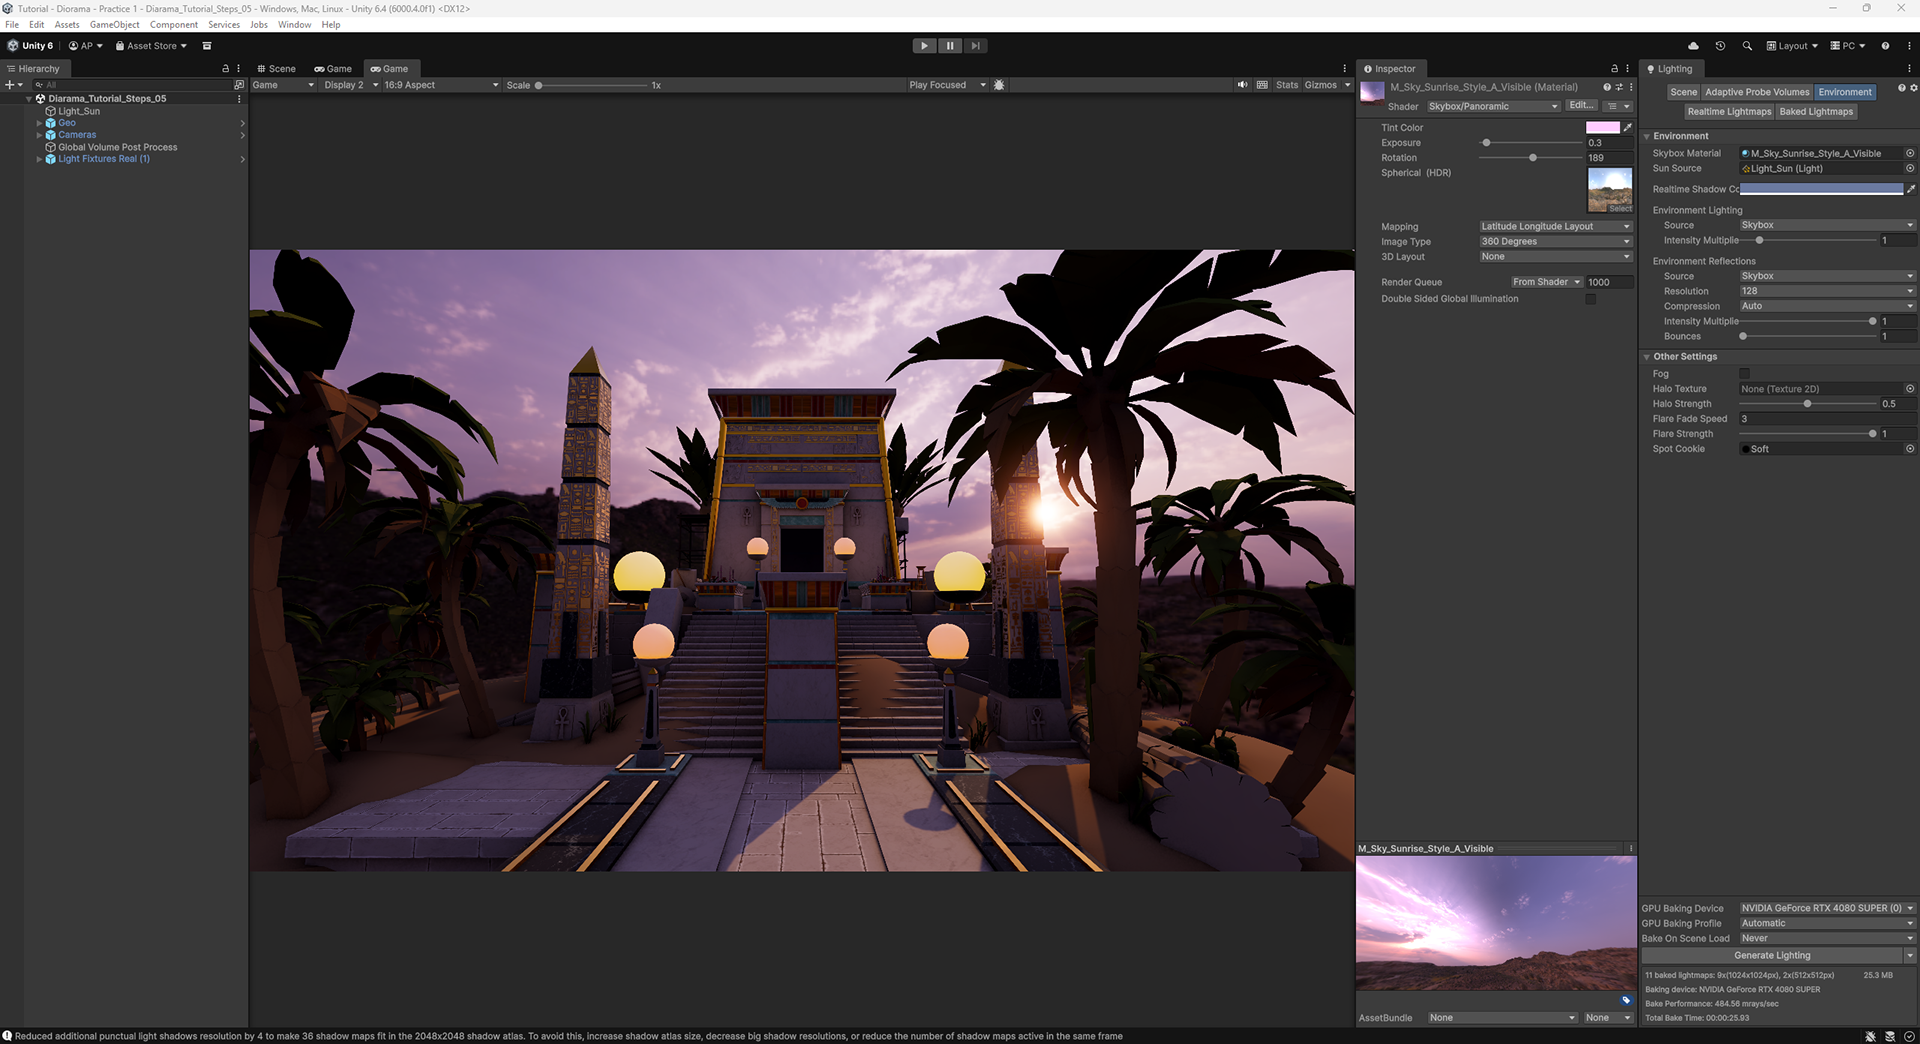
5. Tonemapping, Sky Brightness and Bloom
Create the perceived brightness of the scene.
Create a Volume with a post process definition, assigning overrides for the Tonemapping (ACES) and Bloom.
I am partial to the ACES tonemapper, since it's an industry standard and adds some nice contrast to the lighting. Assign the tonemapper before choosing your skybox exposure, since it will affect how bright the scene feels.
The HDRI skybox is our "ground truth" for lighting. The settings for the skybox and post processing will determine how bright the scene feels.
Before adjusting the exposure of the sky, set the sky Tint Color to white. It's gray by default, which means that the skylight is already being underexposed by being multiplied against that gray. (You don't *have* to do this, but I prefer not to have additional multipliers on my light colors, since it makes it harder to manage intensity values)
Adjust the exposure of your sky to be how bright you'd like it to be in your scene. This is essentially adjusting the exposure in the lighting instead of in the camera, which you might do in other rendering pipelines.
The bloom post process effect creates the illusion of overbright or overexposed areas in the scene. This is key in helping the viewer understand how bright the scene is. How the bloom is tuned is somewhat subjective, but it should feel real.
Turn off the directional light and bake the lighting to test if the sky exposure is where you want it.
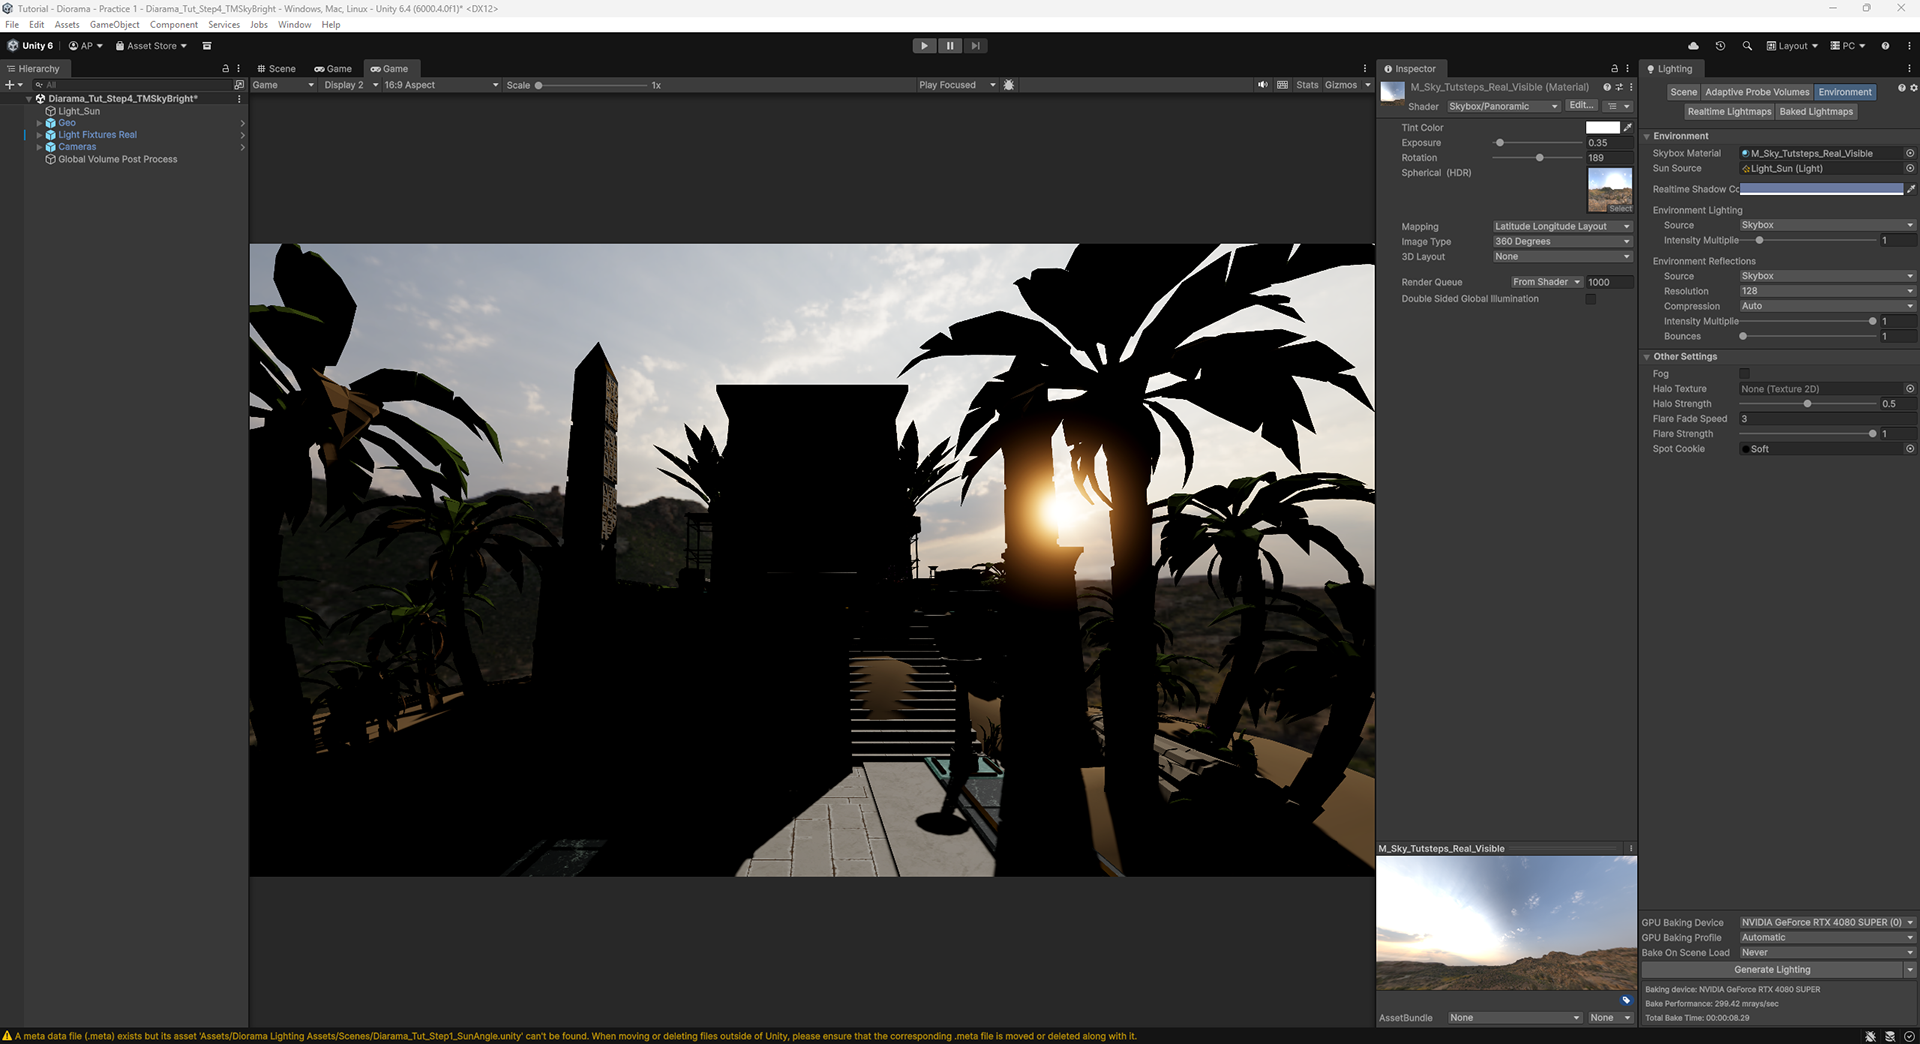
Adjust sky exposure
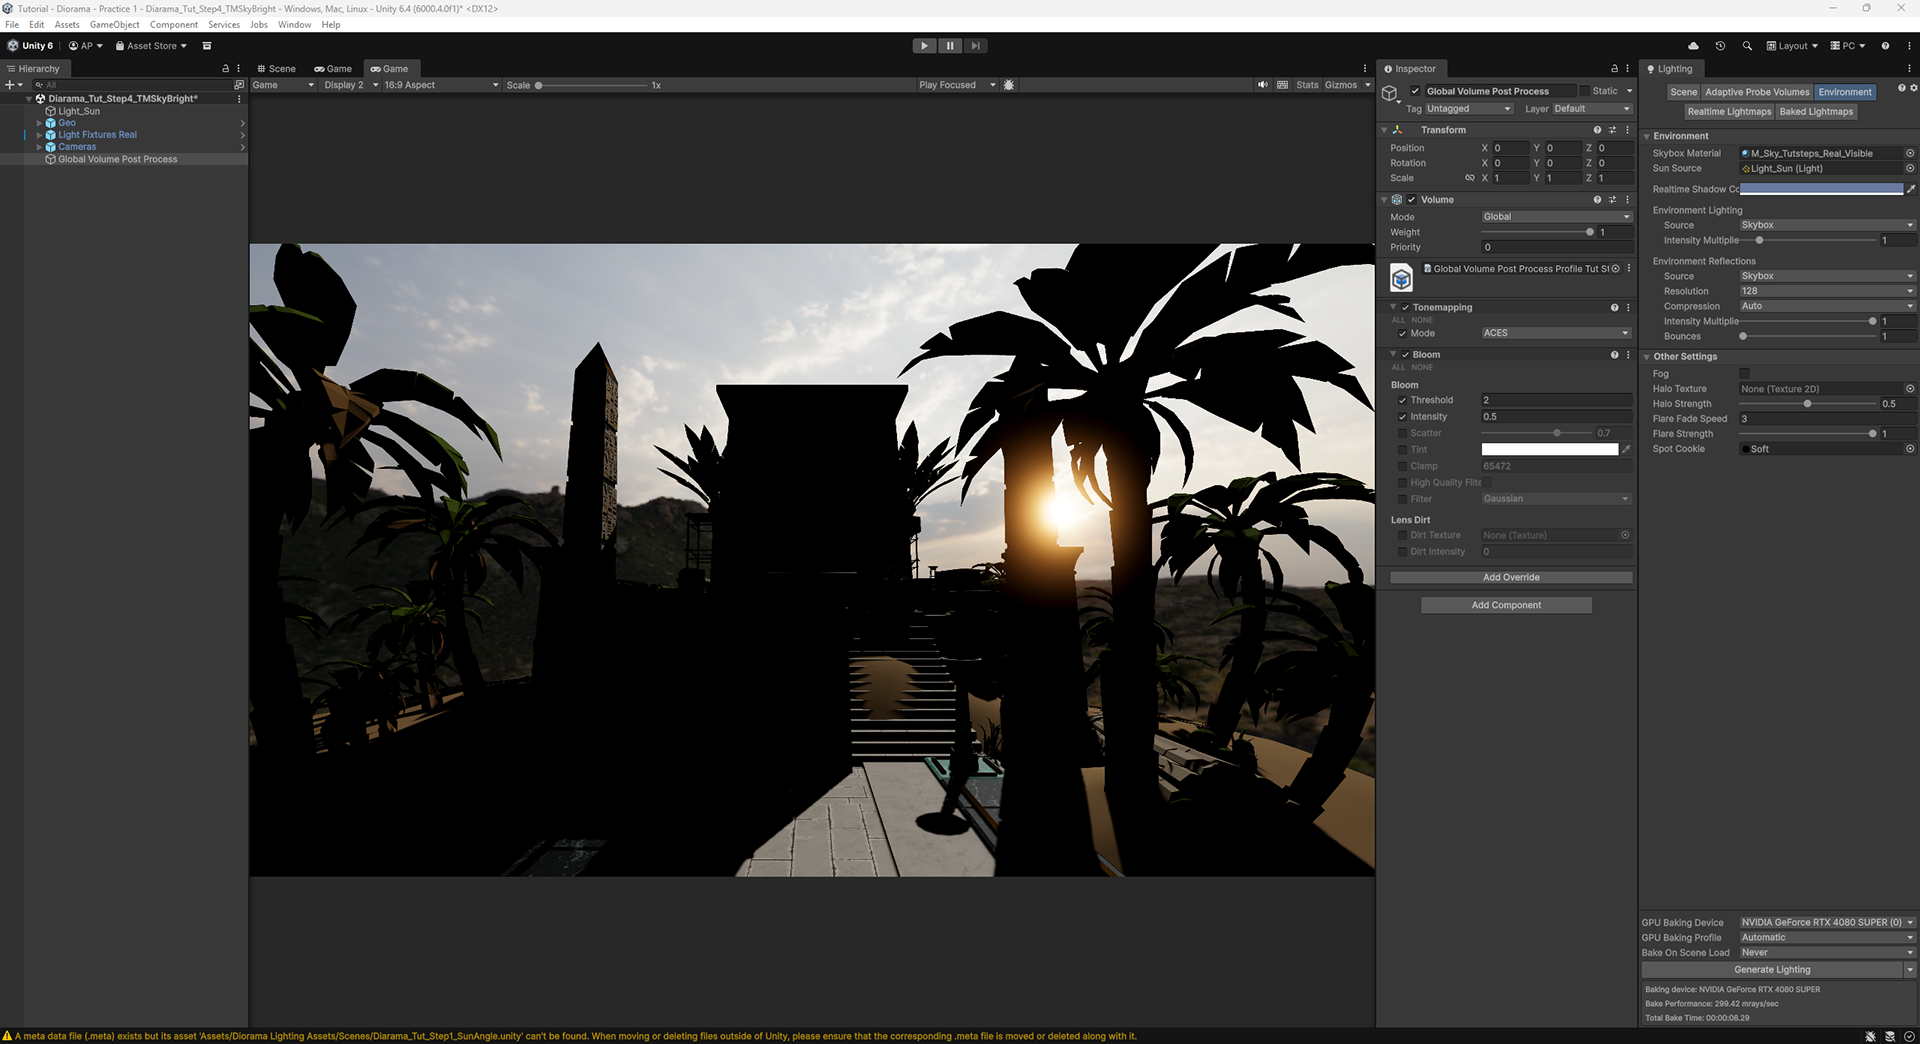
Tune bloom
Bake to check lighting
Why Turn the Directional Light Off?
If you bake lighting with the directional light on now, it will be incorrect. The reason for this is that there is sunlight illumination from the HDRI as well as the Directional Light in the scene. It kind of looks ok from one direction, but look what's happening to the shadows; they are doubling up from the two different sun directions.
6. Create a Reference Image
Render the lighting from only the HDRI to create an image of realistic lighting.
Turn off the Directional Light and bake the lighting. This will give you an idea of what color and intensity the sunlight should be in the scene. Since the sun angle has been adjusted to differ from the HDRI sky for artistic reasons, we need to separate out the lighting of the sky and the sun.
7. Create a Sunless Sky for Lighting
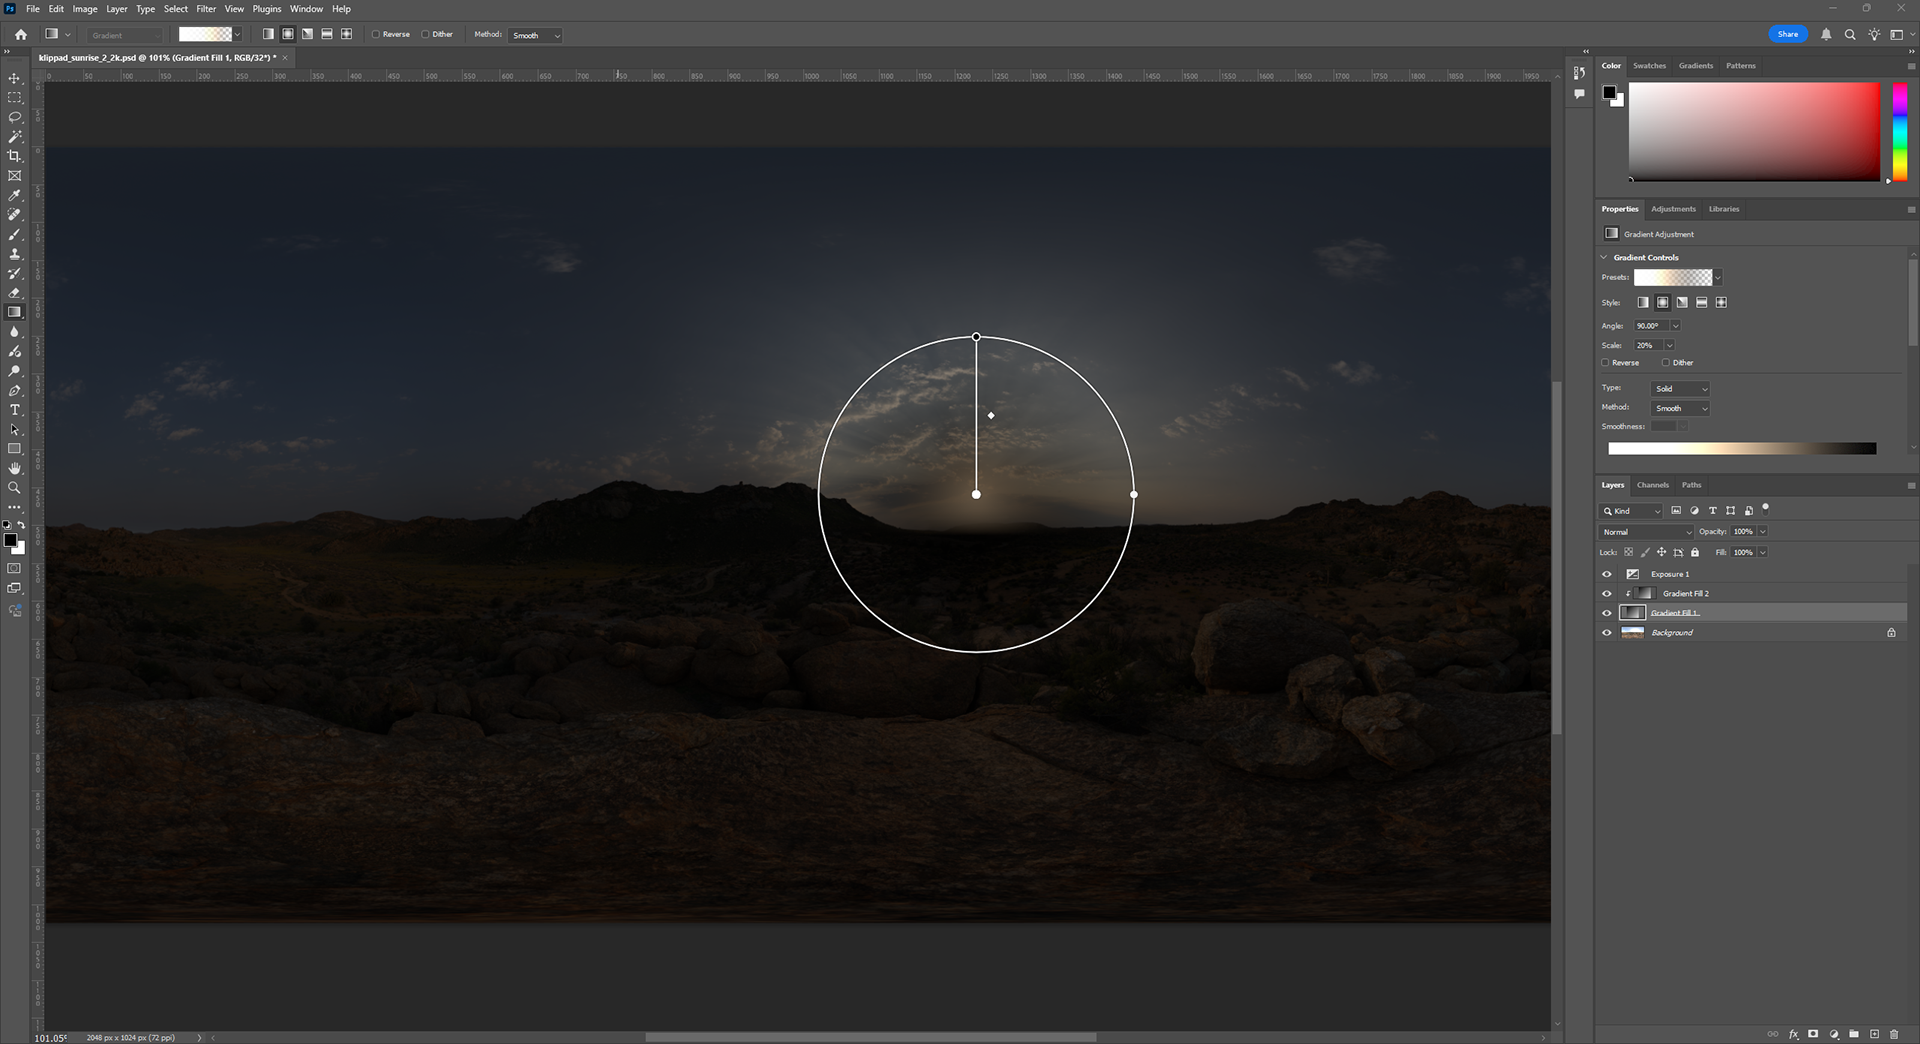
"Paint out" the sun from the HDRI
In a HDR capable image editor (Photoshop, Substance Designer, etc), open the HDRI lighting image. Block the brightest part of the sun with tones that are about the color and brightness of the sky around the sun. You may have to temporarily lower the exposure of the sky image to find the location of the sun. Remove that exposure adjustment prior to exporting a new HDR/EXR file of the sunless sky.
Swap the HDRI in your sky shader to the sunless one you just made (Or create a new sky shader with the same settings and apply the sunless sky to that shader), turn off the Directional Lighting and bake the lighting. Now the lighting should be only lighting from the sky. There's still some directionality from the sky, but the lighting from the sun is mostly gone.
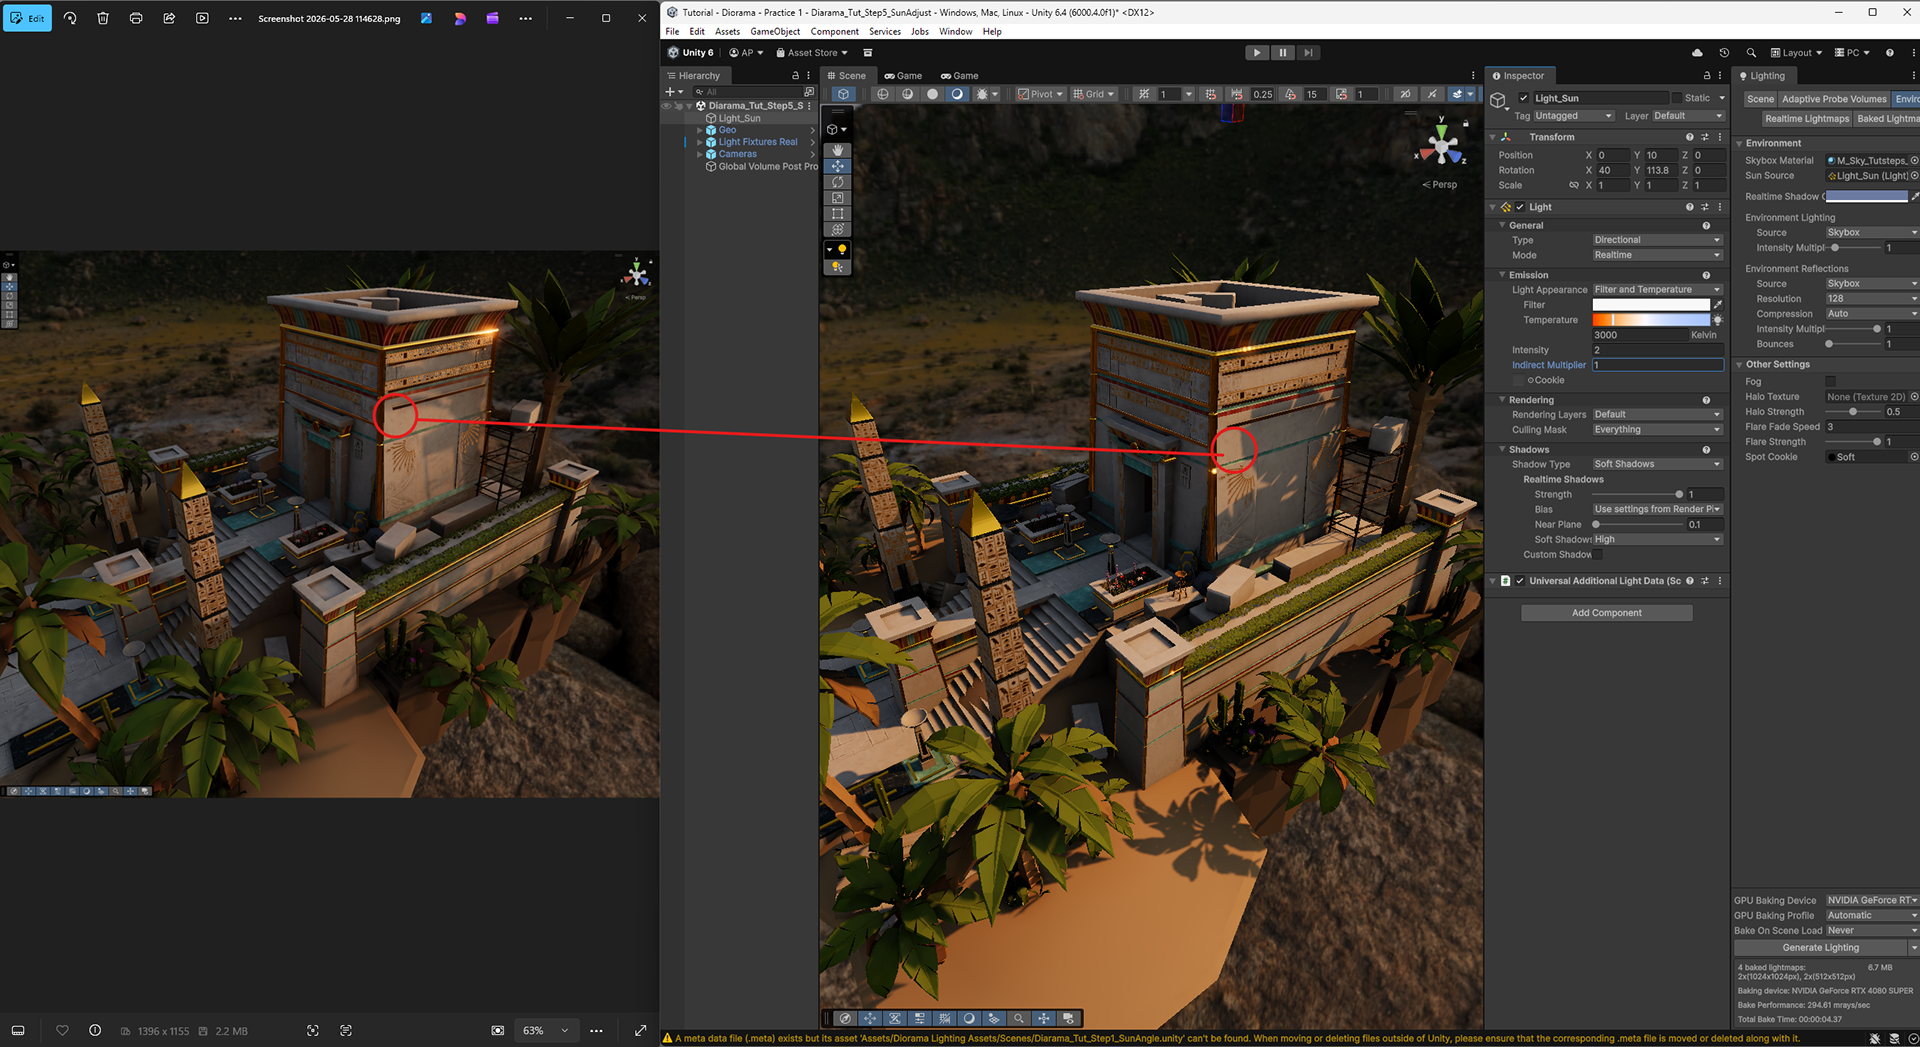
8. Bring Back the Directional Light
Adjust the Directional Light to match the color and intensity of the sun from the reference image.
Looking at the reference image, tune the color temperature and intensity of the Directional Light to match the HDRI sun. The lighting won't be an exact match, since the angles are different.
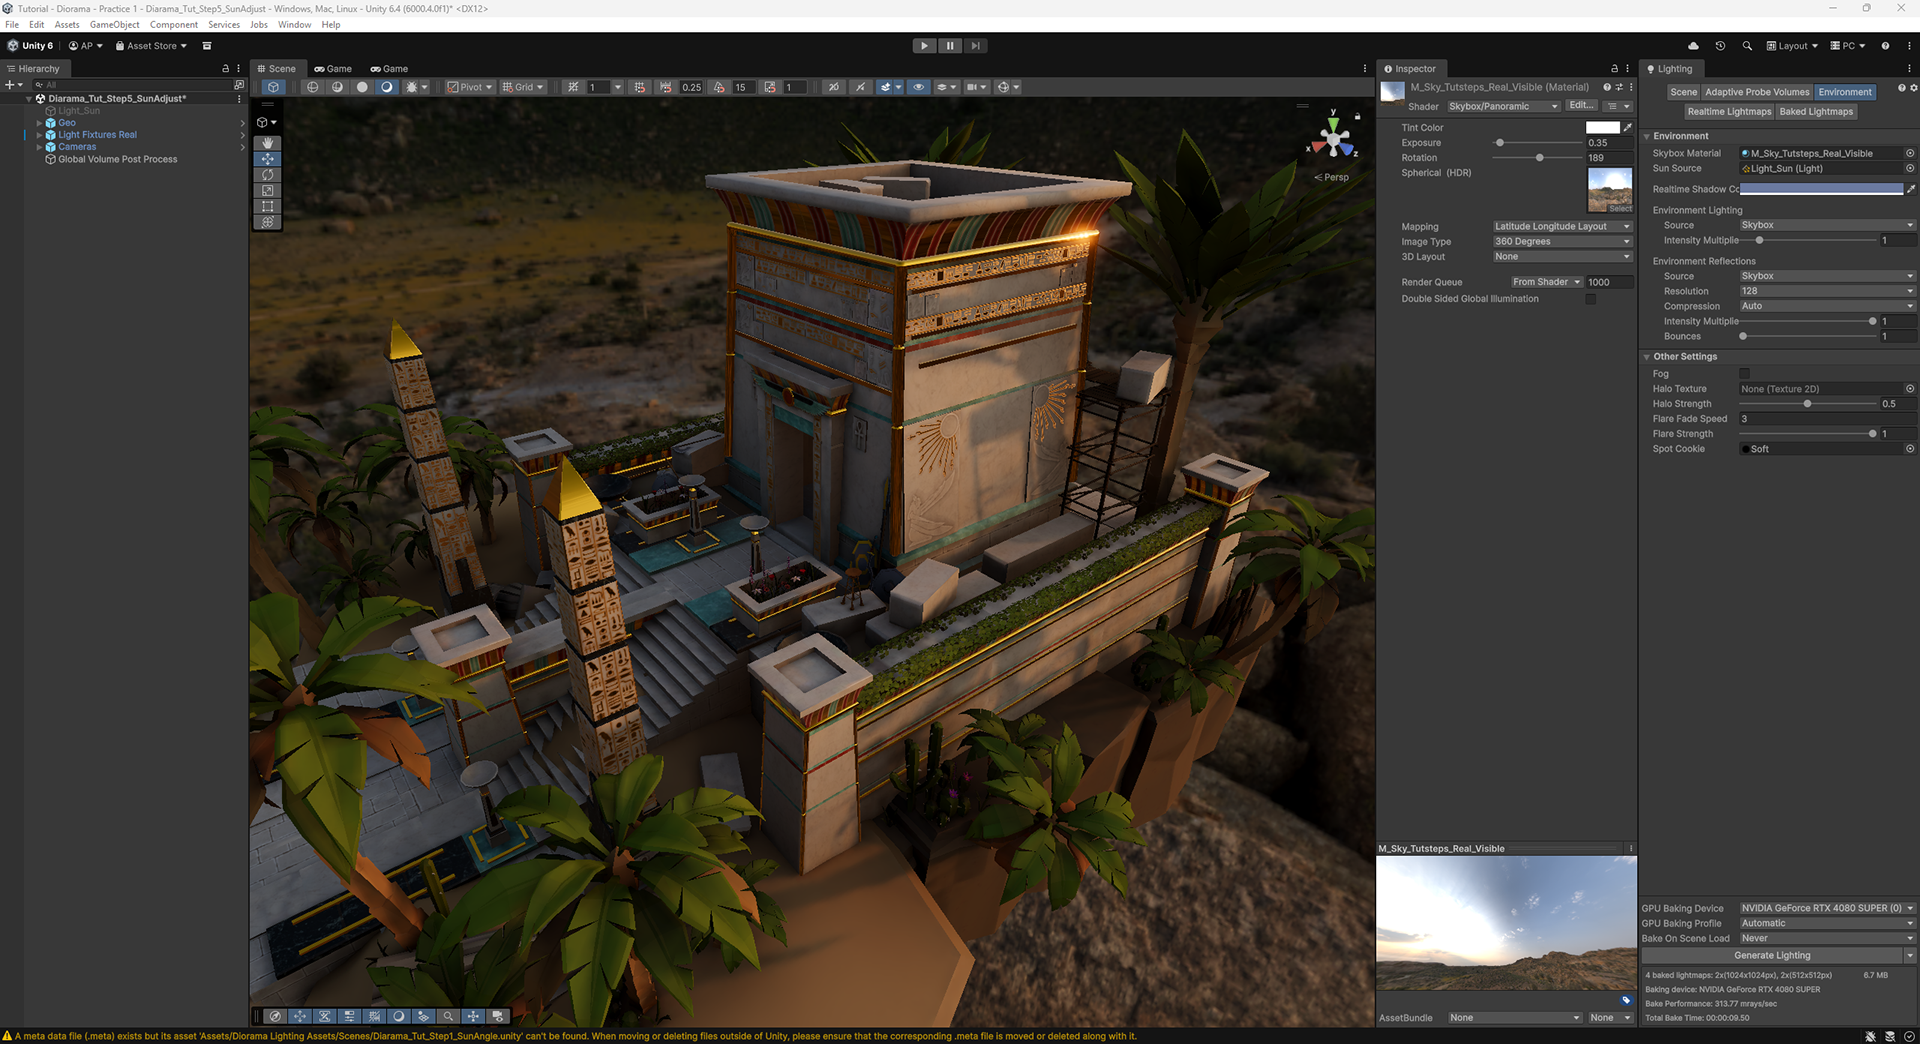
You should now have a scene that has accurate HDRI lighting with a custom sun direction.
9. Adding Light Fixtures
How bright should light fixtures and emissive values be?
This is a fairly tough question to answer succinctly. For this scene, I estimated the emissive values of the fixtures based on how they feel in the natural lighting, and then set the light intensity value to the emissive intensity value. I'm using both lights and emissive surfaces for the fixtures. To avoid double lighting, I've turned off affect global illumination on the "bulbs".
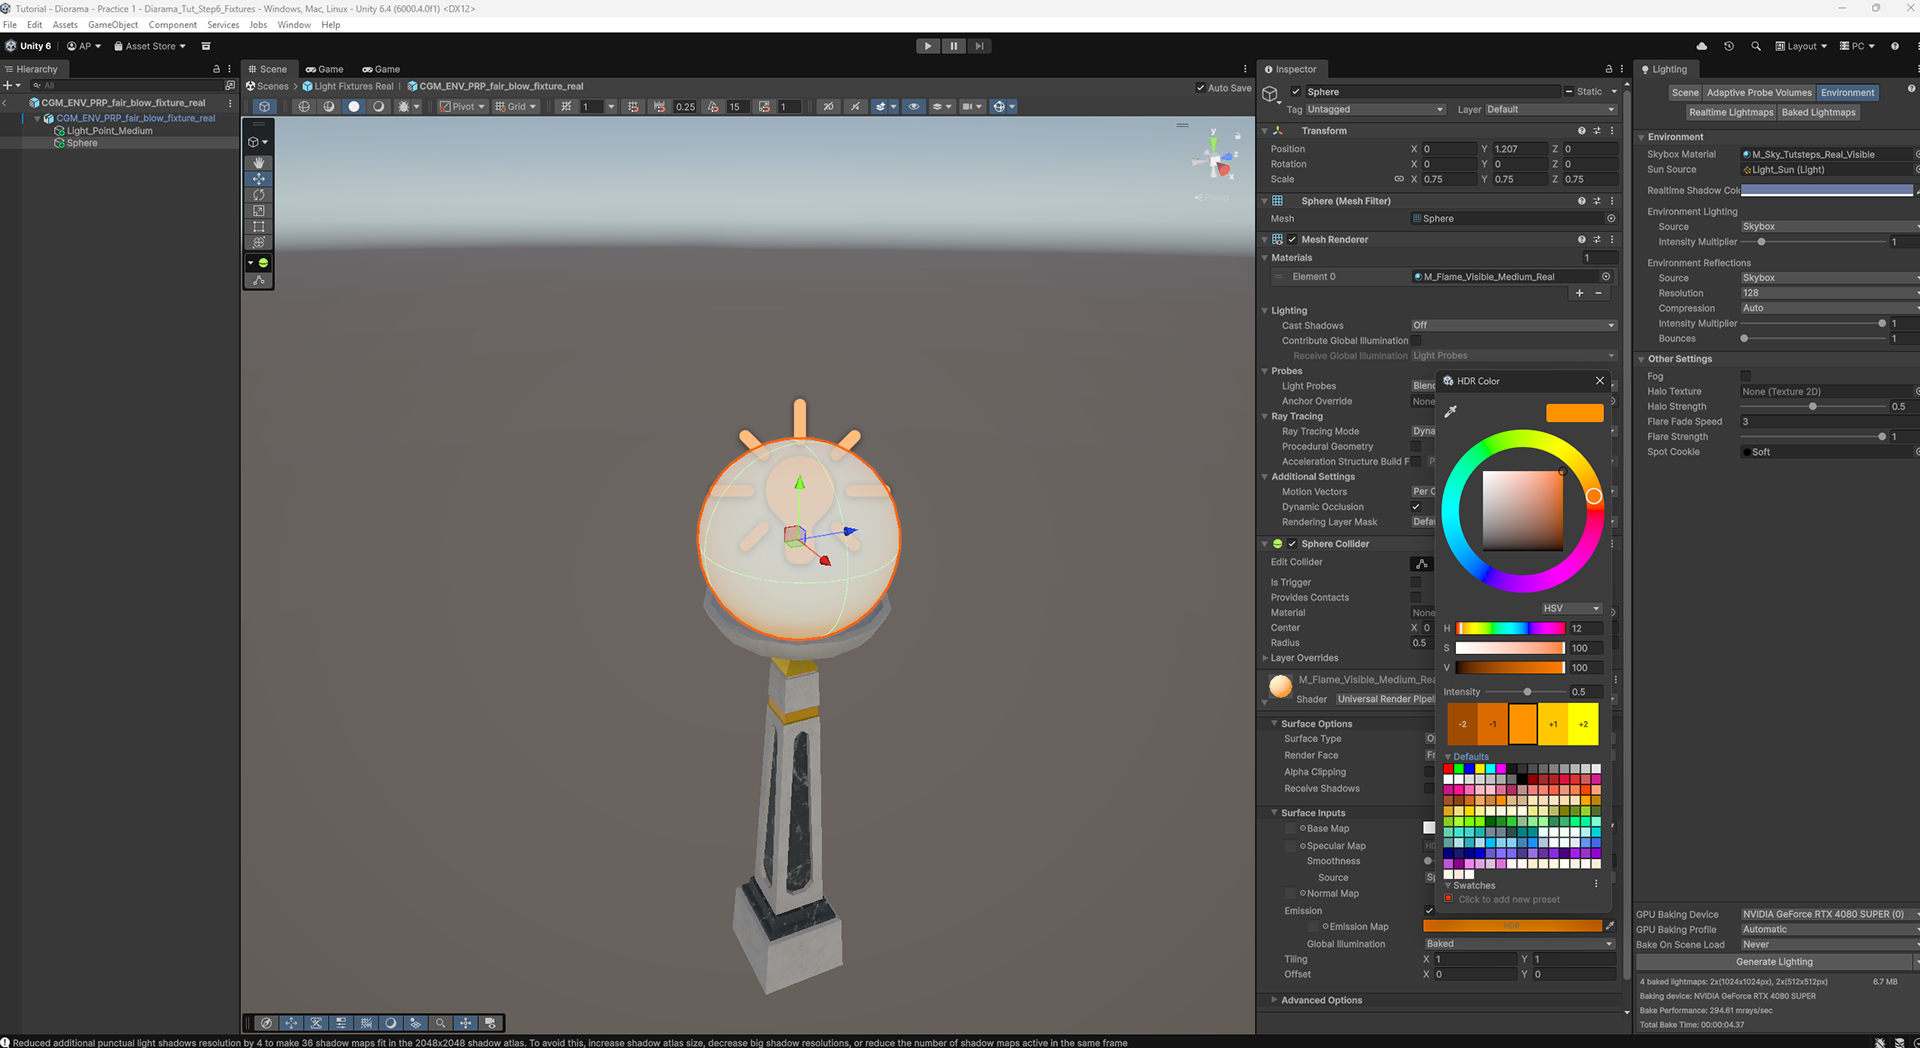
No shadows, no GI from "bulbs". Color is driven by estimate of light temperature.
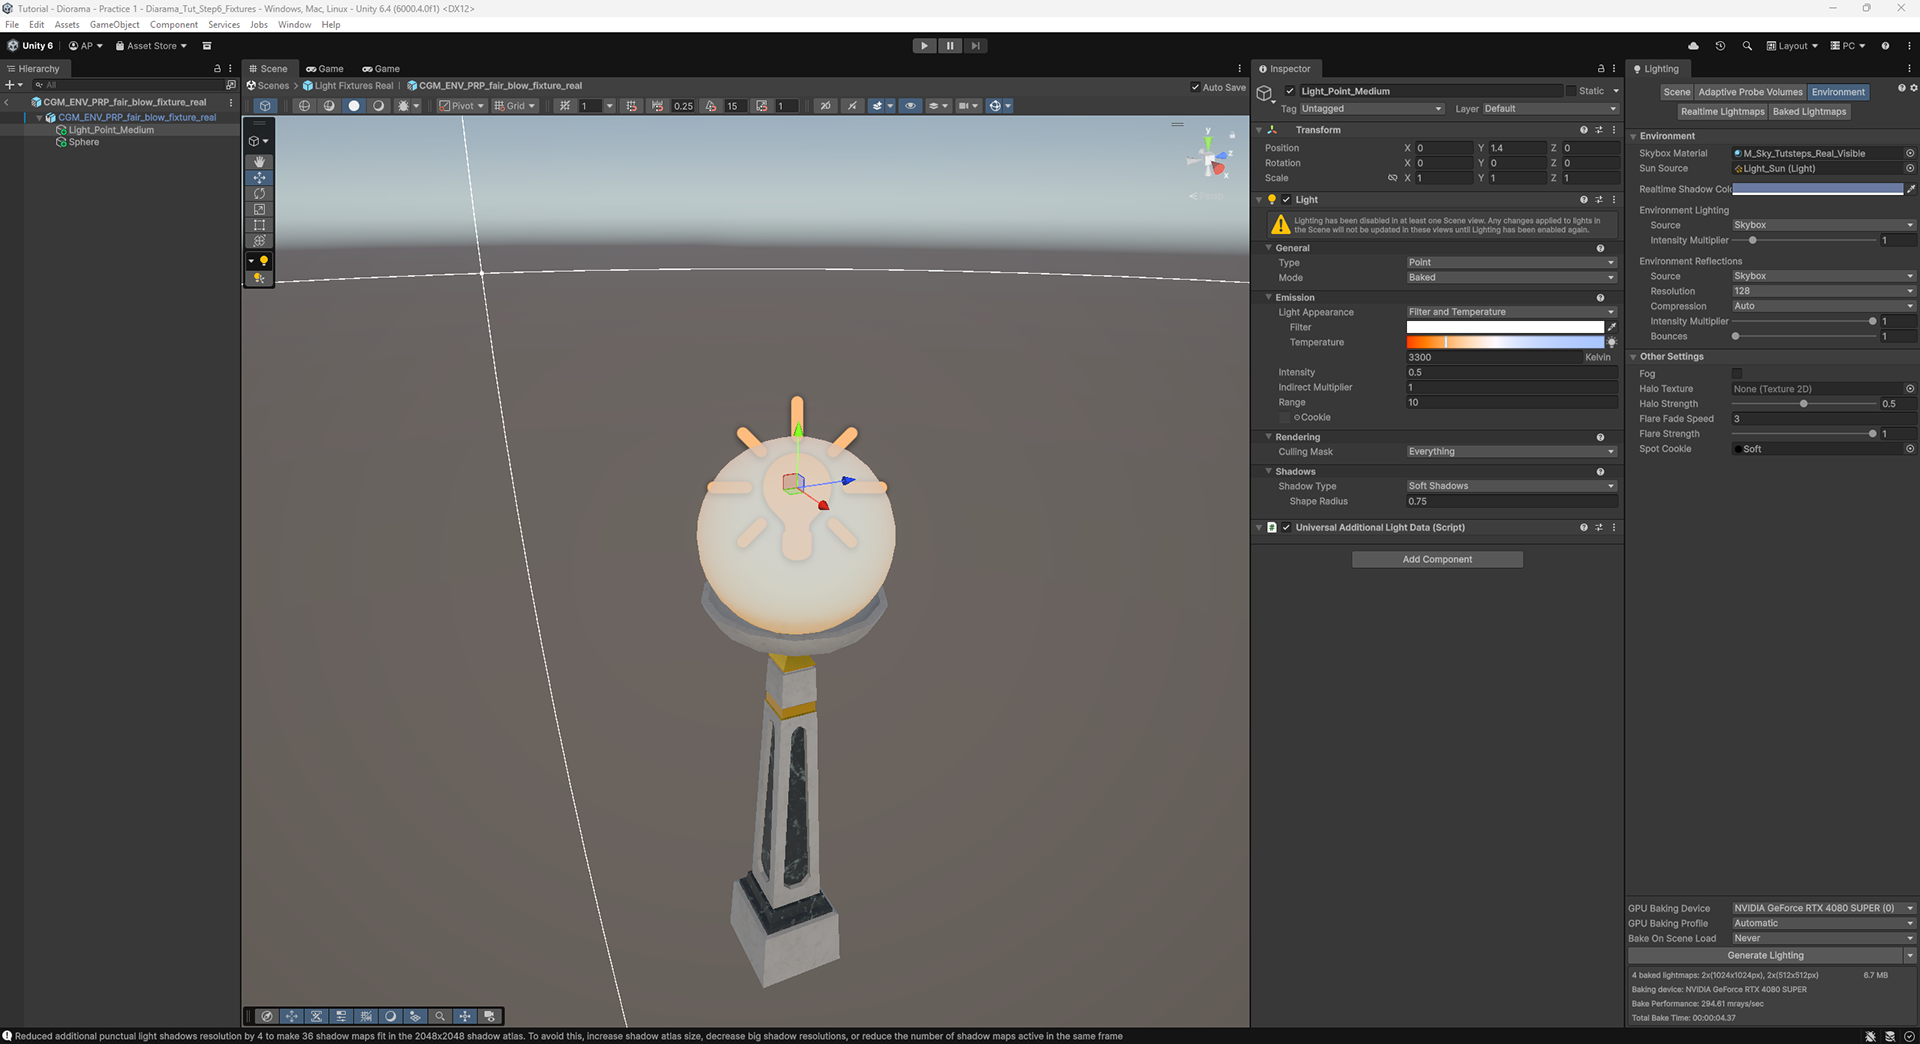
Light intensity is set to same value as emissive shader HDR value.
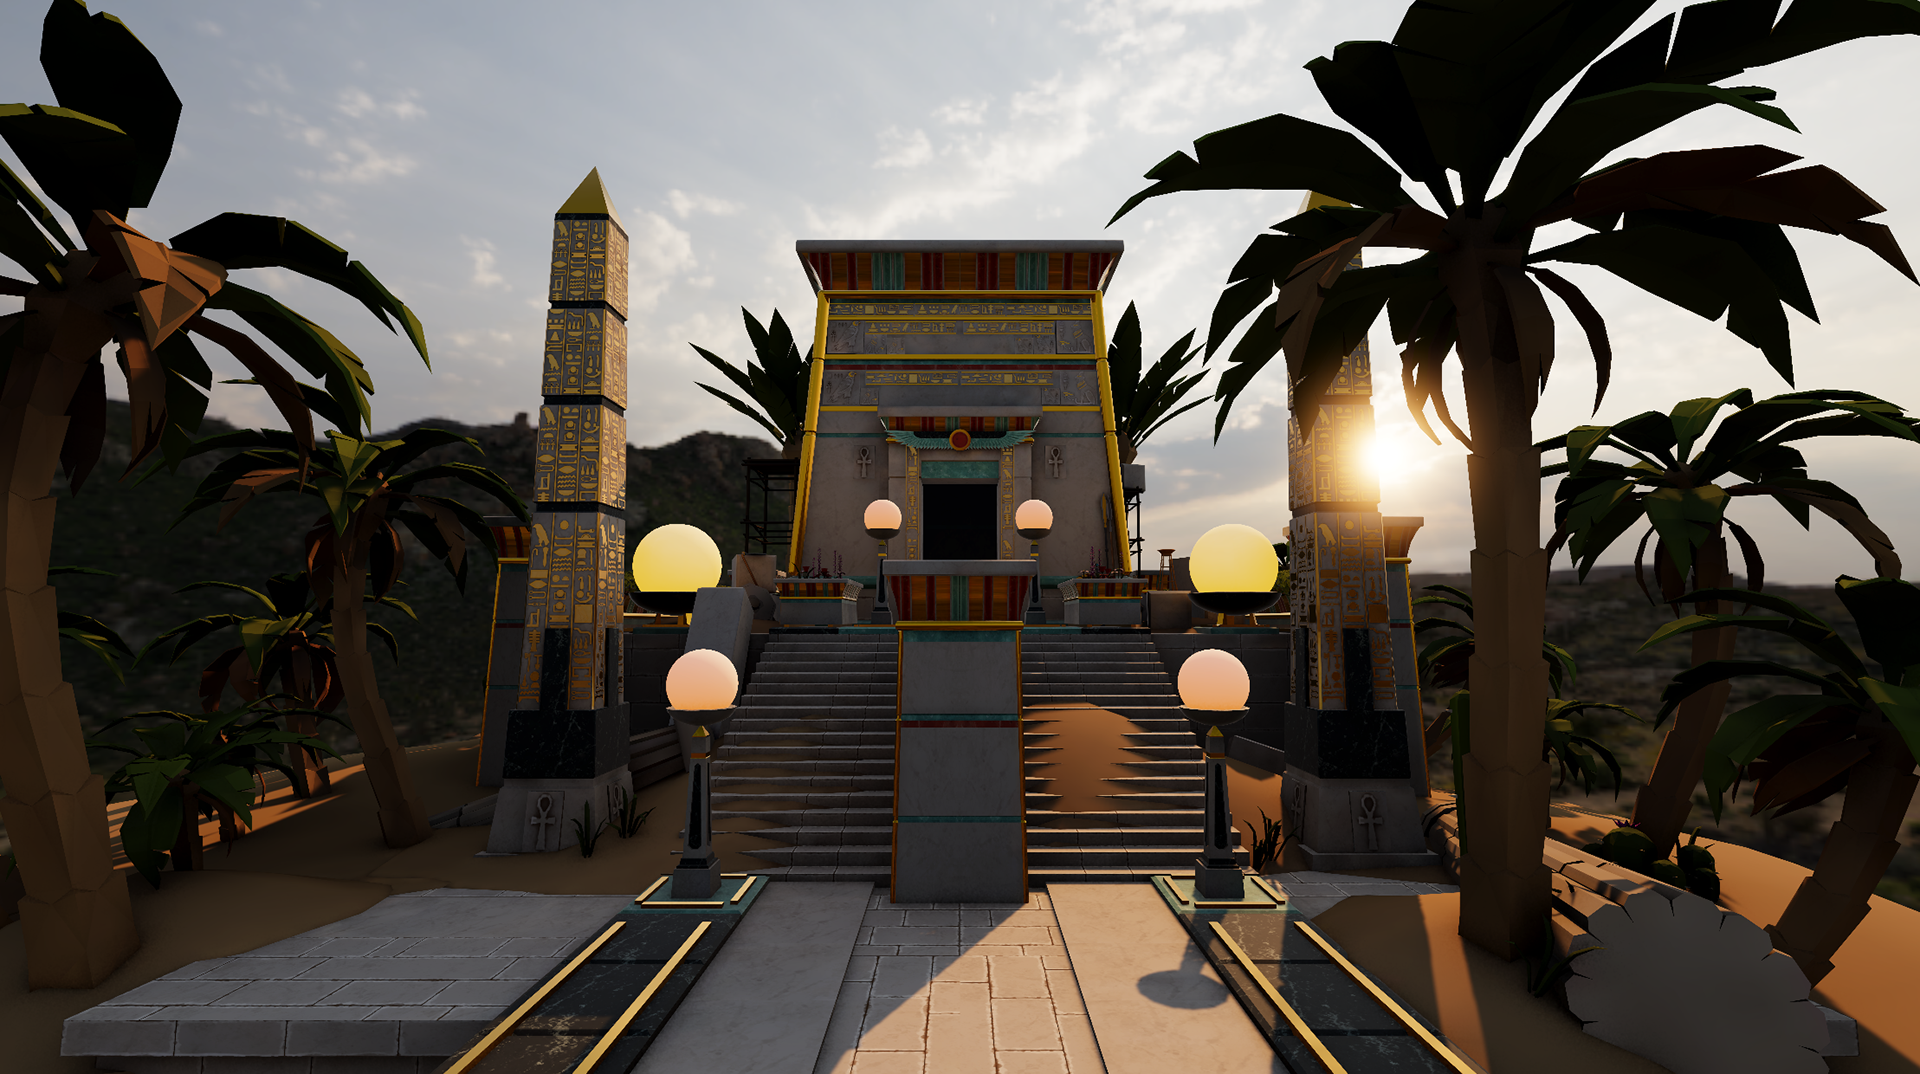
Stylizing the Lighting
Choose the stylizations based on the creative goals.
There are a lot of different choices to make when stylizing any artwork. Each choice to break from reality should be in service of the creative goals of the piece.
The first choice for stylization was actually picking a sun angle that deviated from the sun in the HDRI.
My personal choices for this piece are that I want to this scene to feel rich and inviting. I want to pull in pinks and reds to compliment the warmth of the sun. Here are the specific changes that I made.
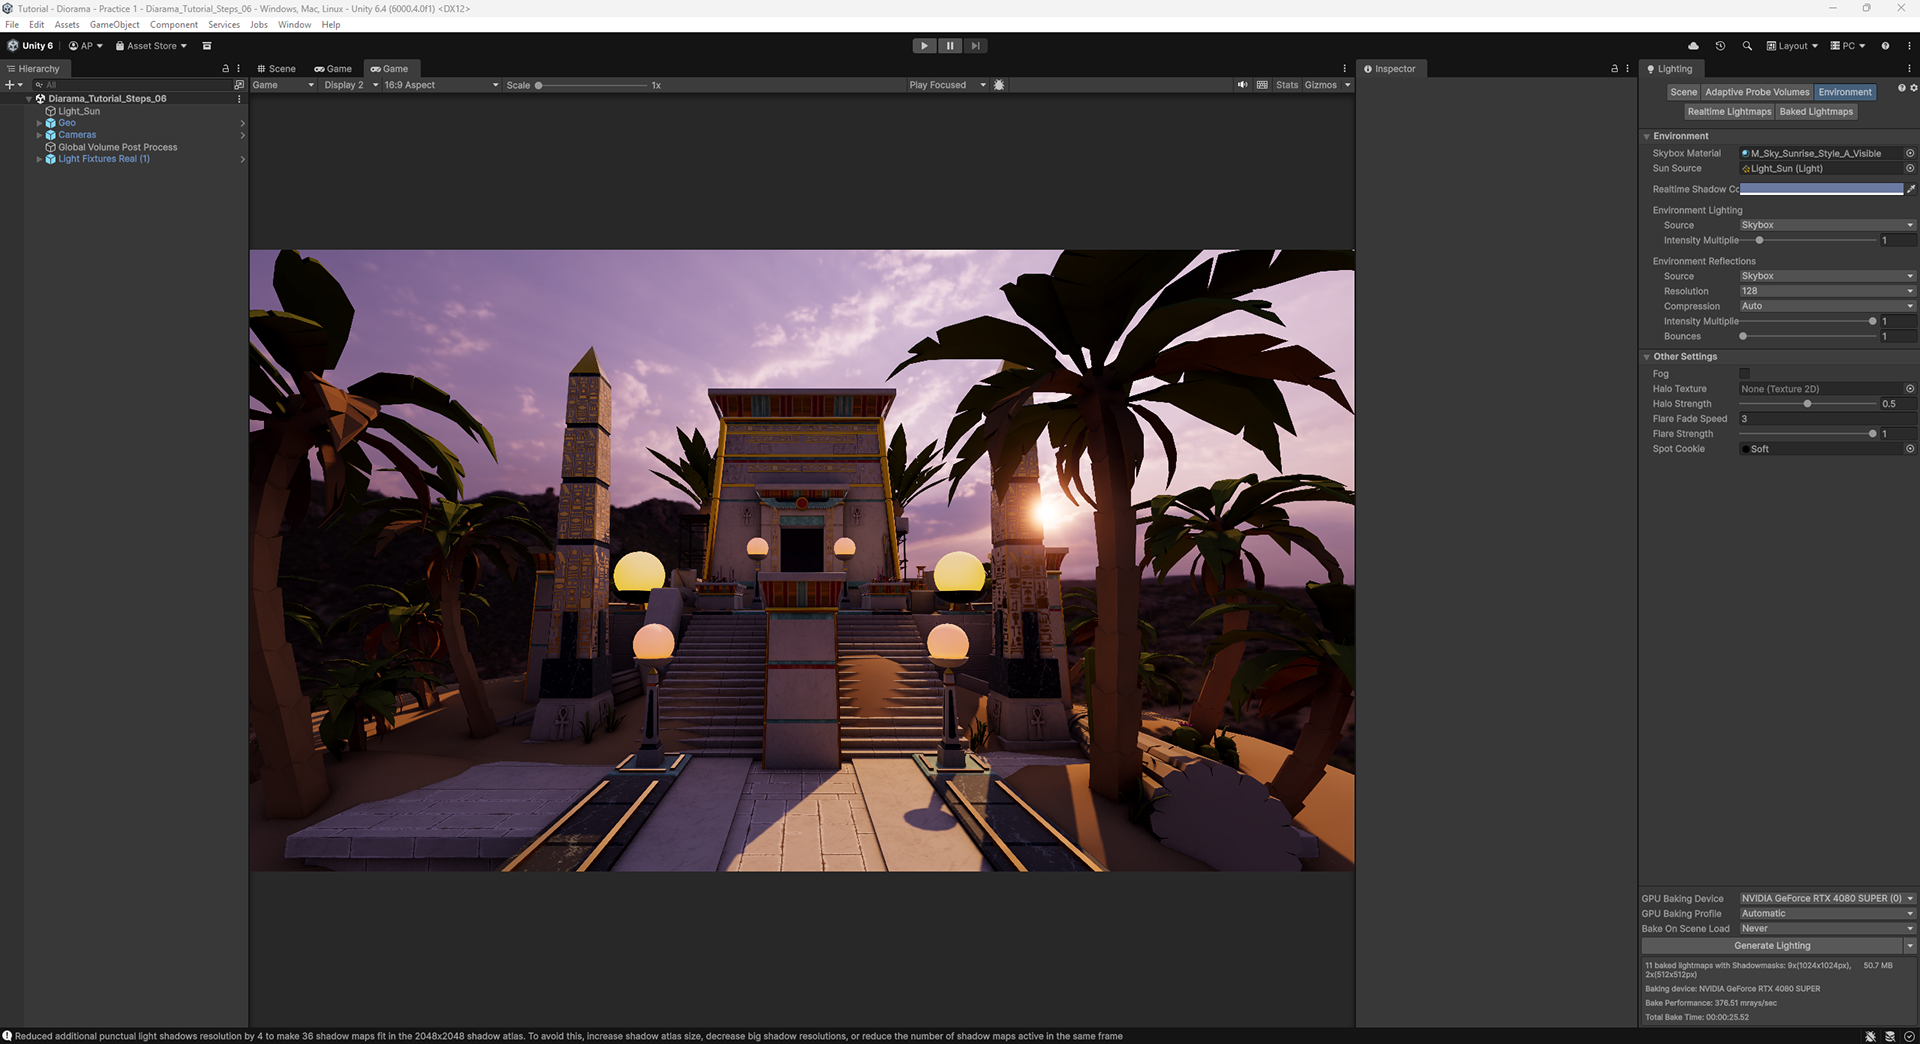
10. Brighten and Tint the Sky
The sky brightness could have been raised in the realistic version as well. There's nothing more or less realistic about a brighter or dimmer scene - it's just how you want the scene to look.
I brightened and tinted the lighting version of the sky. (Note that any sky tint will dim the output of the sky lighting since all colors seem darker than pure white.) I also brightened and tinted the visible sky shader, but a bit differently than the lighting sky, to dial in the values the way I wanted them.
Brightening the sky will brighten the ambient light in the scene reducing the contrast between the sun and the sky.
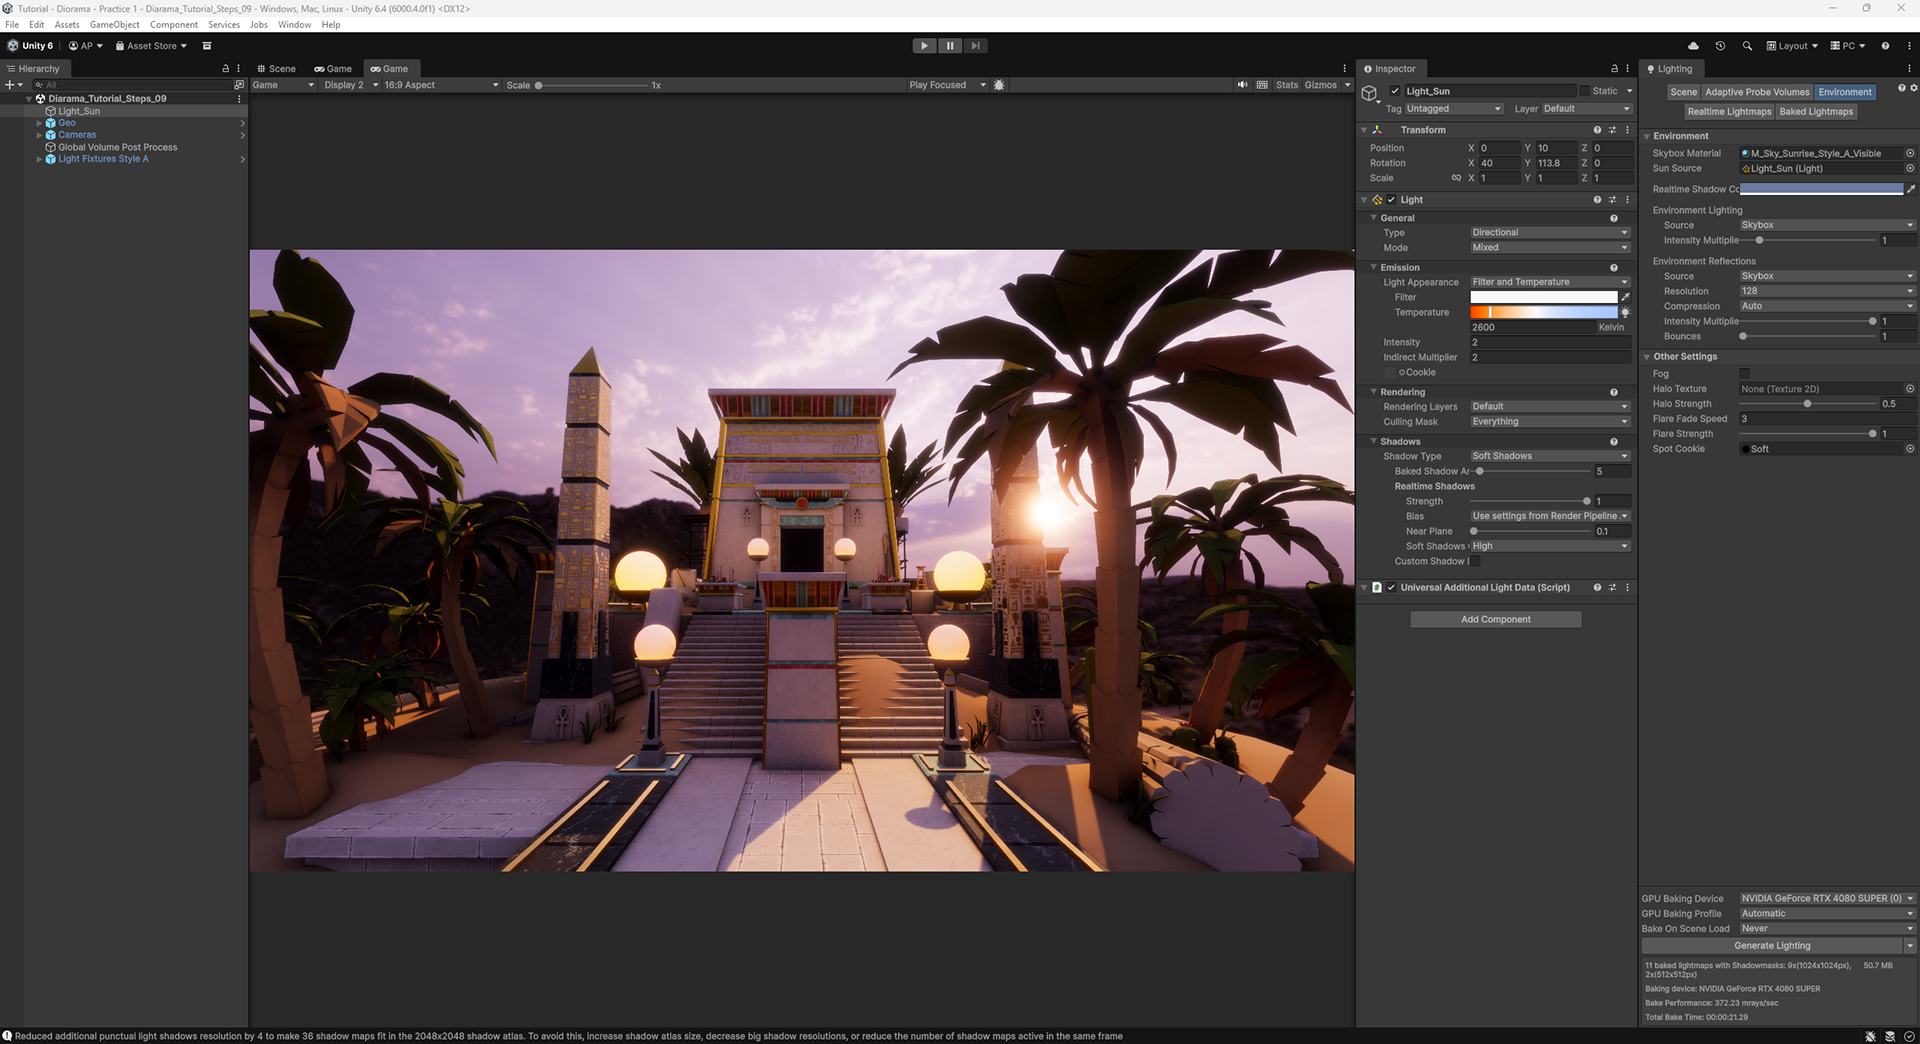
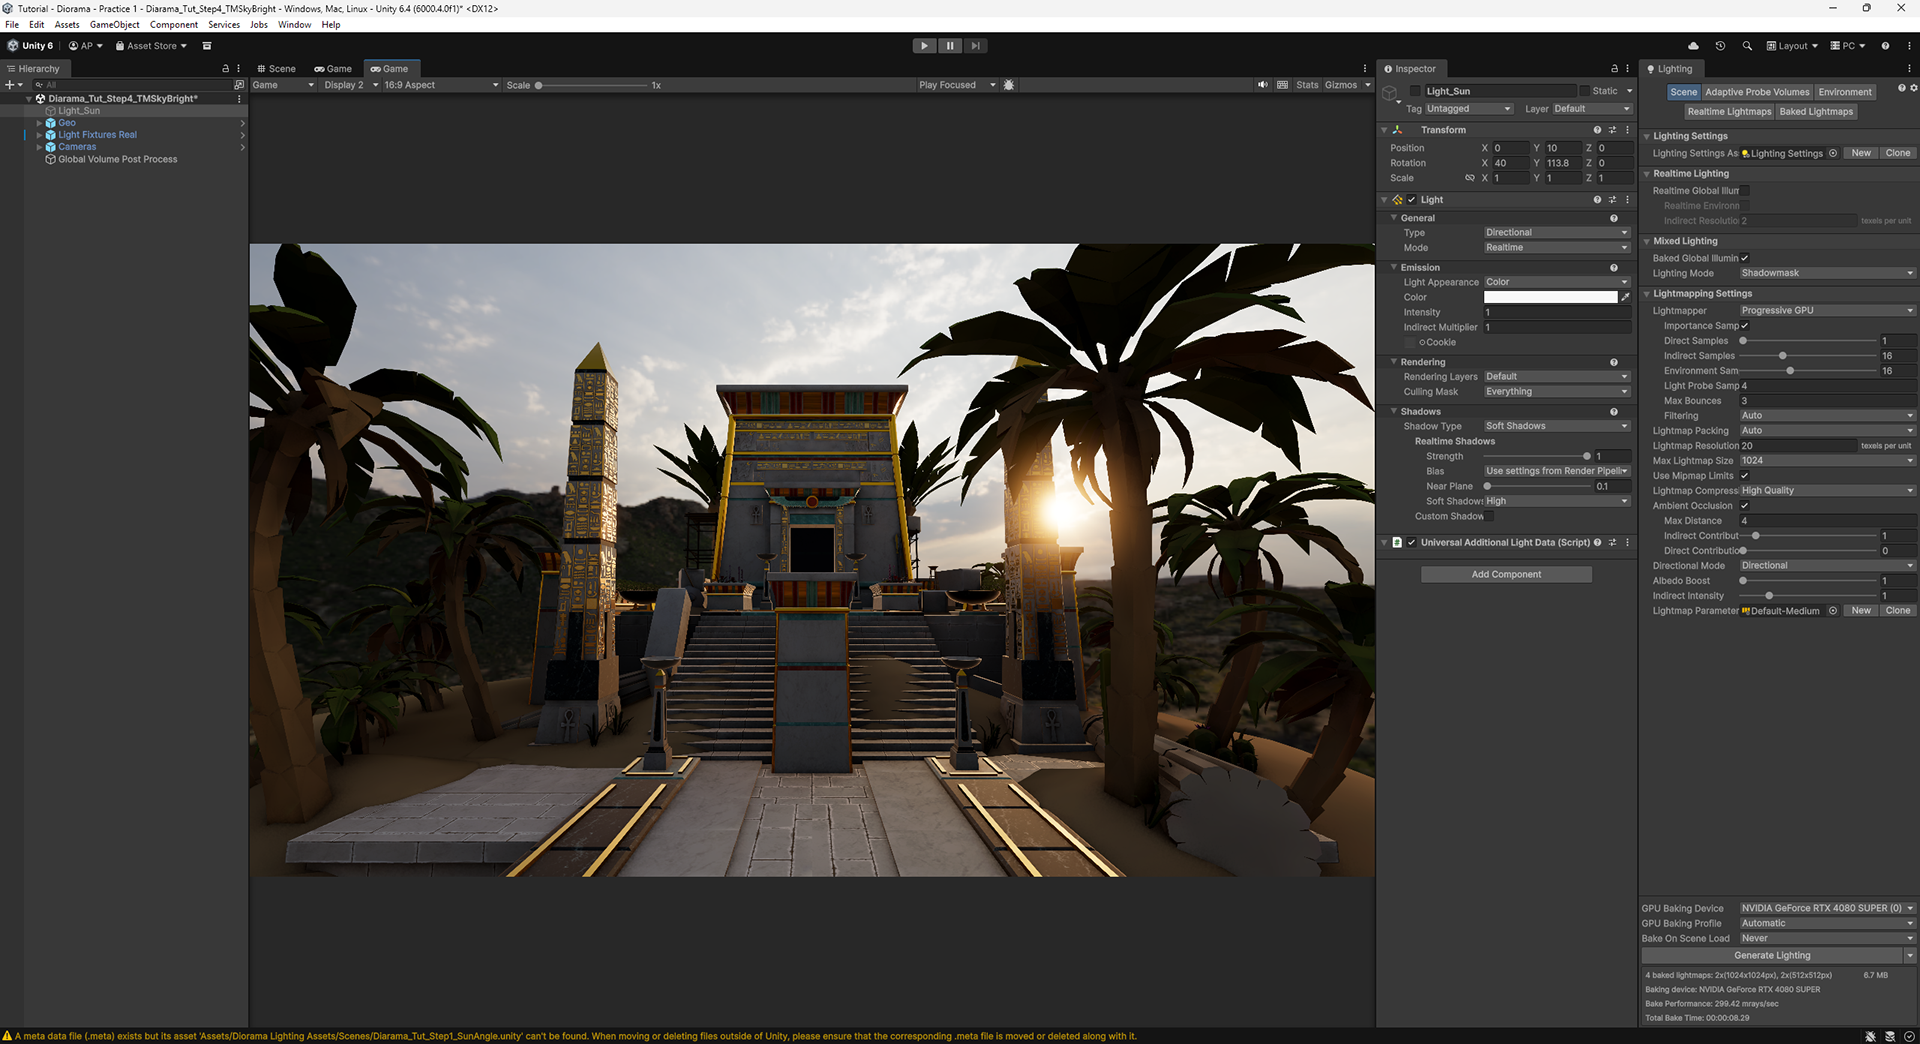
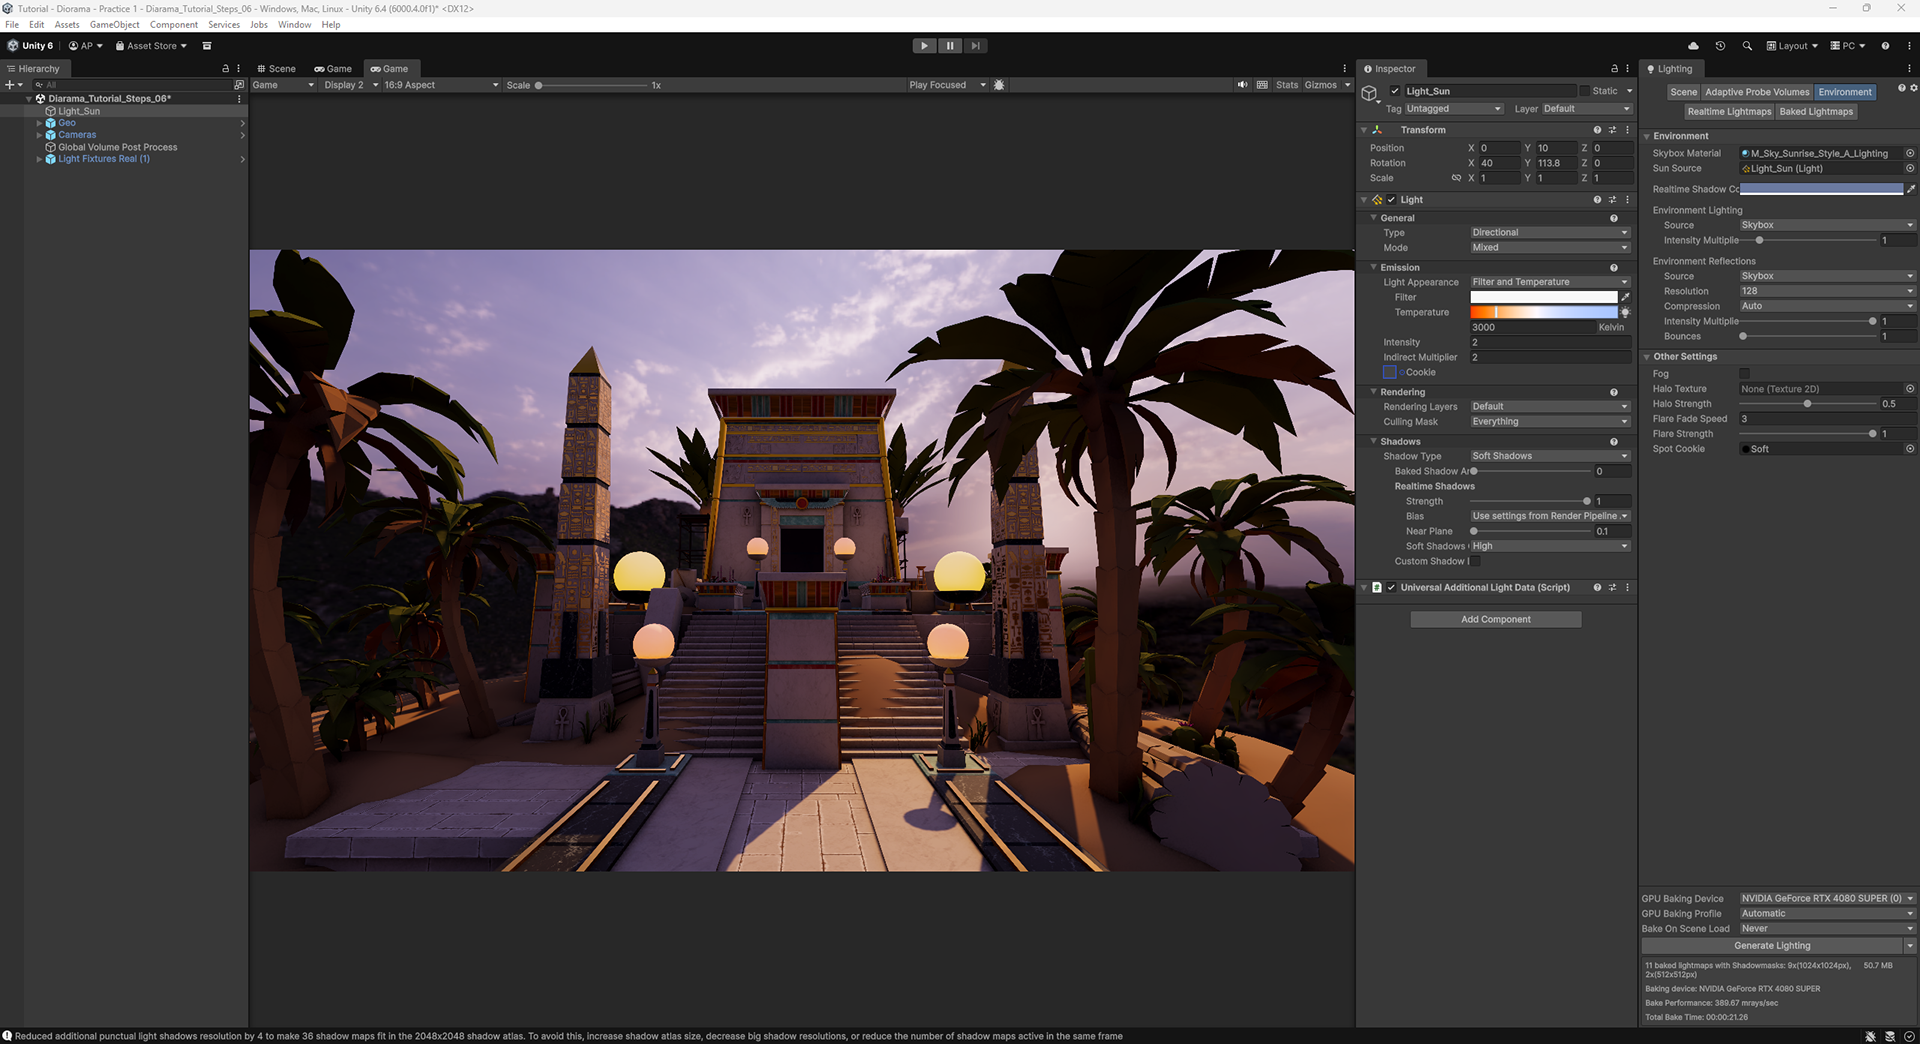
11. Warm Up and Increase the Intensity of the Directional Light
I wanted the sun to feel brighter and warmer, so I increased the intensity of the sun and lowered the color temperature. Note that I've switched the Directional Light from "Realtime" to "Mixed", which will allow the indirect light from the sun to be baked. I've also increased the indirect intensity of the Directional Light.
12. Increase the Indirect Lighting Contribution
I wanted to make the scene lighter and warmer. I could have made it lighter by increasing the sky intensity again, but that would have made the overall lighting cooler. Instead I chose to increase the intensity of all indirect light. This means there's more interplay of all the light.
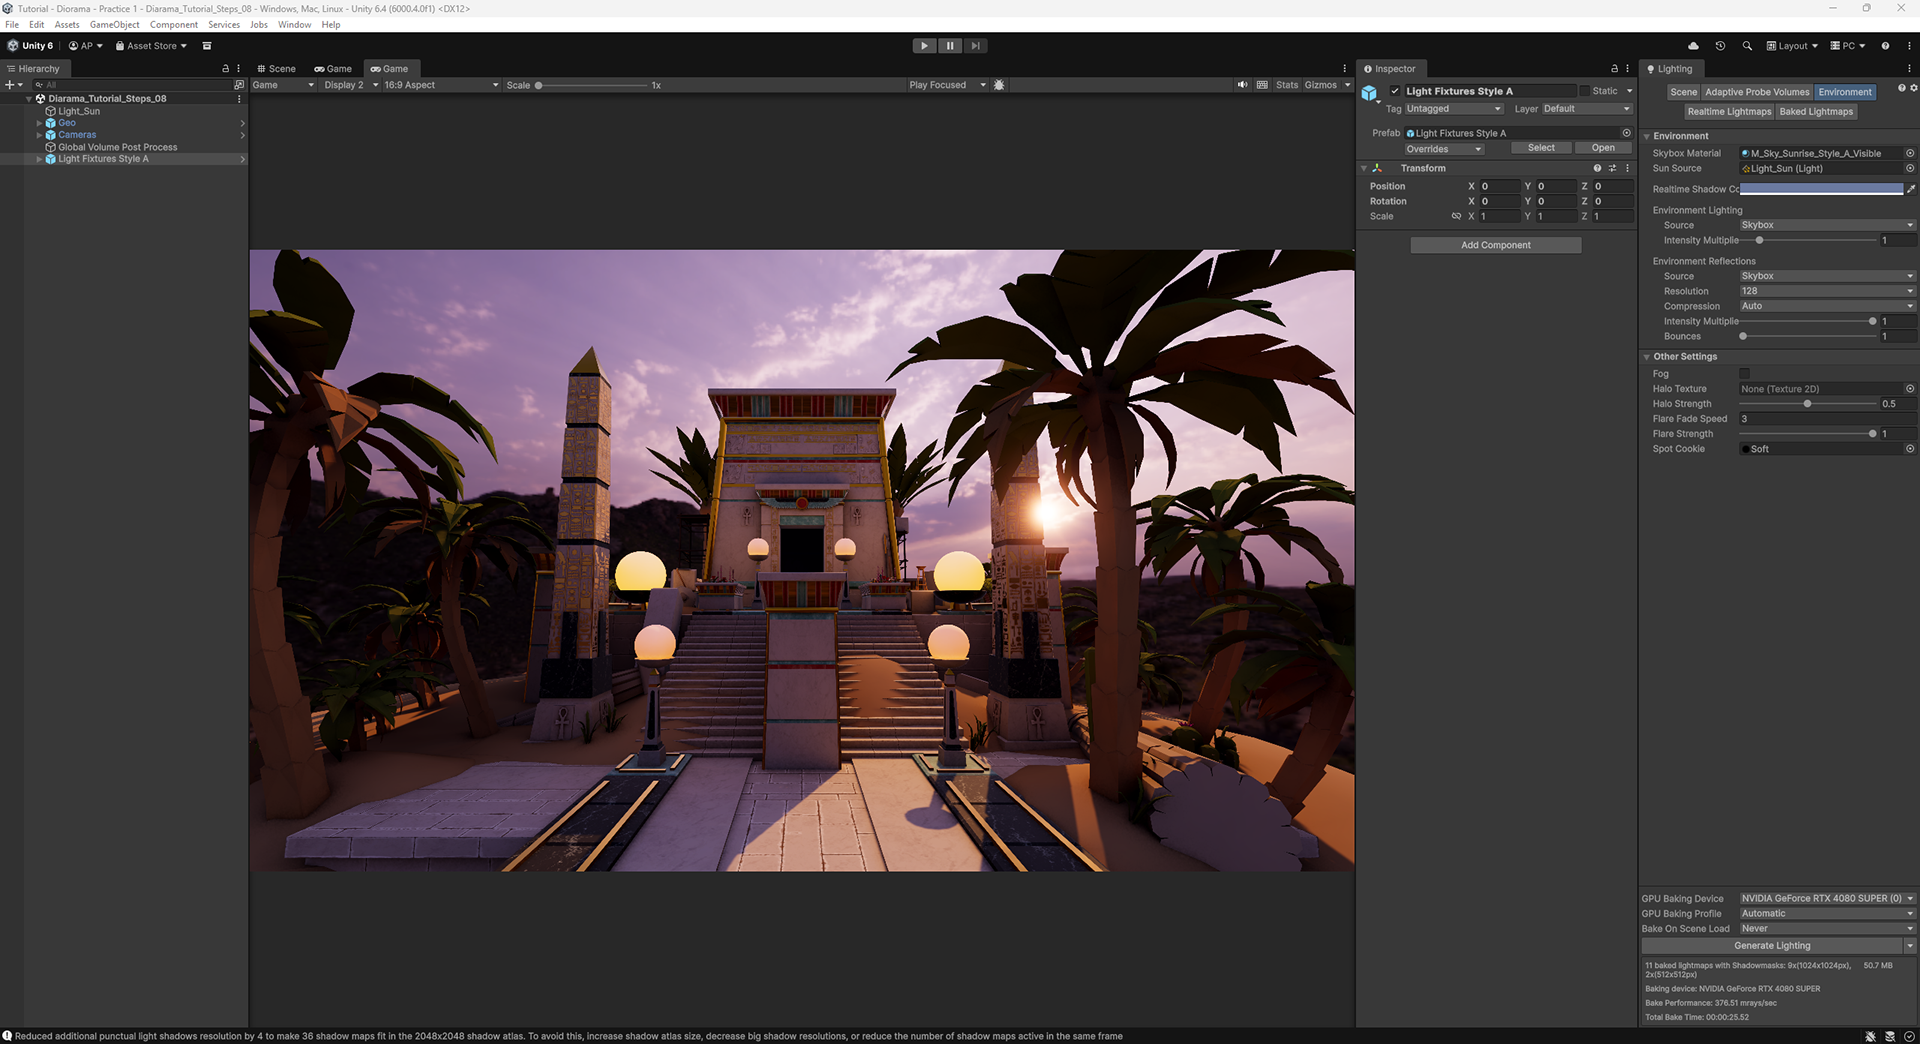
13. Increase the Warmth and Intensity of the Light Fixtures
Generally speaking brighter "artificial" lighting is more appealing, since it can offer more warm, glowing objects in the scene.
14. Tune the Bloom
The last piece of this work was to lower the threshold for the bloom so that more of the sky and even diffuse reflective surfaces will bloom. Then I increased the intensity of the bloom to make sun feel brighter and the surfaces more luminous.